Chapter 1 Enable The Validator
26
Enable The Validator
NOTE: If you make any changes to the default configuration menu
items, you will be prompted to save the configuration.
See “Auto Save Configuration” in the
Quick Setup Guide
.
Software can automatically detect an installed validator when the
printer is powered up. If the printer is powered up with Power-Up
Config. set to Factory, the VALIDATOR menu will be available and
Validator Funct. is set to Enable in the QUICK SETUP and
VALIDATOR menus.
If Power-Up Config. is not set to Factory, the VALIDATOR menu
appears, but Validator Funct. is set to Disable. Enable Validator
Funct. by completing the following steps. (This is a one-time setting
once you save the configuration.)
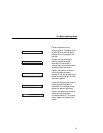
1. Press to take the printer offline and place the printer in
Menu mode.
2. If necessary, press ↓ and
↵ at the same time to unlock the
↵ key. (This key combination can be changed by the user. Use
the customer’s key combination if necessary.)
3. If necessary, press until VALIDATOR displays.
4. Press ↓ until Validator Funct. displays.
5. Press + or – until the Enable displays.
6. Press
↵ to enable the validator. An asterisk (*) should appear
after Enable. Once enabled, the printer will command the
validator to begin scanning and reporting errors, and the
counters will be incremented.
7. Press ↓ and
↵ at the same time to lock the ↵ key, then press
PAUSE to take the printer offline.
8. Press PAUSE again to put the printer online.
.
.
.
.
.
.


