2-56
COPIER
Contents
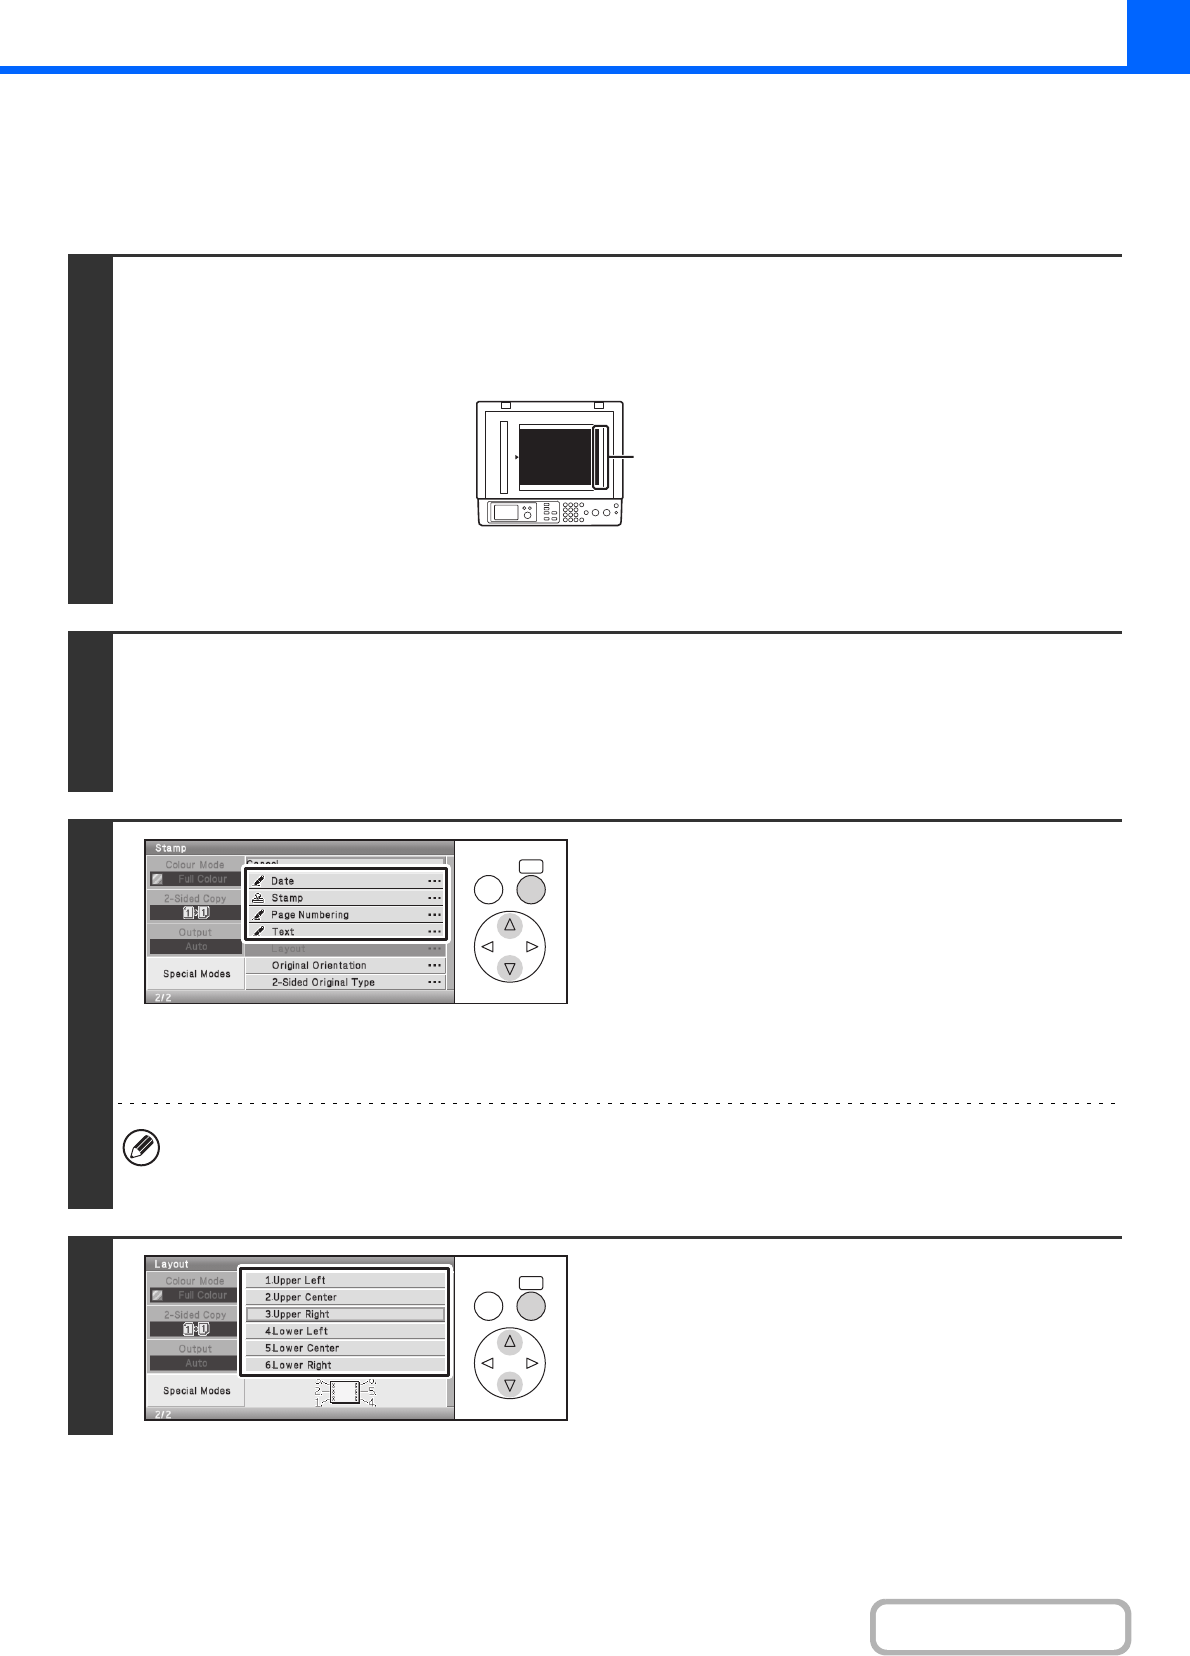
GENERAL PROCEDURE FOR USING STAMP
To select stamp settings, follow the steps below.
Keys in the display can be selected with the arrow keys and the [OK] key.
1
Place the original.
Place the original face up in the document feeder tray, or face down on the document glass.
When using this function with a portrait original on the document glass, place the original so that the top of the image is to the
right.
After placing the original, specify the original size.
☞ ORIGINAL SIZES (page 2-28)
2
Select the special modes.
(1) Select the [Special Modes] key.
(2) Select the [Stamp] key.
☞ Special modes menu (2nd screen) (page 2-40)
3
Select Stamp.
For detailed information on each of the stamp items, see the
following sections:
Date: ADDING THE DATE TO COPIES (Date)
(page 2-58)
Stamp: STAMPING COPIES (Stamp) (page 2-60)
Page numbering: PRINTING PAGE NUMBERS ON COPIES
(Page Numbering) (page 2-62)
Text: PRINTING TEXT ON COPIES (Text) (page
2-66)
• "Date" and "Page Numbering" cannot be selected in multiple positions.
• It is not possible to set "Date", "Text", or "Page Numbering" in a print position in which "Date", "Text", or "Page
Numbering" is already set.
4
Select the print position.
Select from 6 positions: top left, top centre, top right, bottom
left, bottom centre, bottom right.
By default, the following print position is selected.
Date: 3.Upper Right Stamp: 1.Upper Left
Page Numbering: 5.Lawer Centre Text: 1.Upper Left
abc
Top of image to
the right
OKBACK
OKBACK
