


Appendix A: In Case of Difficulty 47
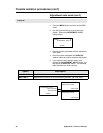
Trouble isolation procedures (con’t)
Poor image quality
When you experience poor print quality, check the
following first:
1. Check that the proper media for the print
resolution is being used.
2. Check that the approved ink is being used, and it
is within its expiration date.
3. Check (at the digital front end) that the proper
RIP color curve is loaded for the loaded media.
4. Check that automatic print head cleaning has
been performed.
5. If the above checks are OK, check the chart on
the following pages for additional suggestions.
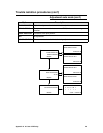
Printer test
To perform a quick overall printer test, use the
following procedure:
1. Turn the printer OFF using its power switch.
2. Ensure that the power cable is firmly connected
to the equipment.
3. Wait at least 30 seconds.
4. Turn the printer ON using its power switch.
5. Print a test pattern (refer to the
Maintaining Print
Quality
section, under
Test
Print for details on
printing a test pattern).
If the test pattern prints properly, the printer is
probably working correctly and the difficulty is most
likely with the host computer or the interface
connection. If image quality is still poor, perform
some or all of the following automatic adjustments.
Adjustment auto mode
Proper adjustment of the ColorgrafX X2 printer is the
key to high-quality, consistent, color image output.
This section covers the details for aligning and
registering the print heads.
Head alignment is automatically performed through
the operation panel menu.