


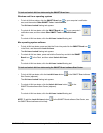


30 Using the Slate and its Tools 99-00666-20 B0
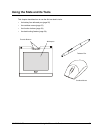
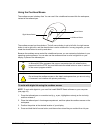
Pressing the side switch as you move the tethered pen on the workspace changes the pen’s
function.
1. Press and hold the upper or lower side switch, depending on the tool you want to apply.
2. Position the pointer at the desired location of your display.
3. Press the pen tip on the workspace, and then move it in the desired manner.
NOTE: You can customize both the upper and lower side switches on the tethered pen (see
page 38). By default, the upper side switch is set to the eraser tool, and the lower side switch is set
to the black pen tool.
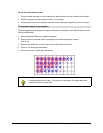
You can press the underlay’s tool strip icons (adjacent) with the tethered pen to select creative
tools, start programs and change the pen’s function. By default, you can select the following tool
strip icons: pointer, eraser, black pen, blue pen, red pen, green pen, right-click, on-screen
keyboard, screen capture and SMART Board software control panel. However, you can customize
and print underlays and tool strip icons (see page 46).
• By default, the tethered pen assumed the pointer function .
• If you press a program button, such as the SMART Board software control panel , the
program automatically starts.
• If you press a creative tool button, such as the red pen tool , position the tethered pen at
the desired location of your display, press the pen tip on the workspace, and then write or draw
like you would with an ink pen on paper.
To use the side switch
To use the tool strip
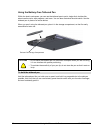
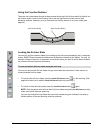
Side Switch (includes upper
and lower side switches)
Upper Side Switch
Lower Side Switch