


I
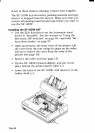
. Disconnect the parallel interface cable from the
printer (if connected).
. Connect the parallel connector of the SPC-8K (the
connector on the cable) to the printer’s parallel conec-
ctor. Move both clips on the printer connector inside
the clips on the SPC-8K connector until they click
into place.
“ Connect the 25-pin ‘D’ connector on the SPC-8K to
the 25-pin end of a suitable serial cable. See “The
serial connector on the SPC-8K” on page 71 for
details of the kind of cable you will need.
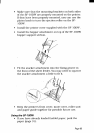
● Connect the other end of cable to the computer’s
serial port (often labeled COM1 or COM2).
Note:
Somecomputersusea9-pinratherthana25-pinserialcon-
nector.Ifthisisthecasewithyourcomputer,youwillhaveto
makeor buya25-to-9-pinadaptor.Seepage71for details.
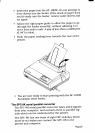
. Make sure that the main body of the SPC-8K is rest-
ing on a table or flat surface. If it is left hanging in
mid-air, this will put strain on the cables, possibly
resulting in damage.
c Make that the computer’s serial port settings match
the settings you have made with the SPC-8K’S DIP
switches (see below).
Using the SPC-8K
When you use the SPC-8K with your computer and
printer, you must remember that you are printing
through the serial, not the parallel port on your com-
puter.
Page70