


k
r
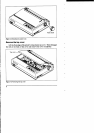
3.
4.
5.
6.
7.
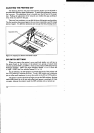
Tear off the printed form at the last perforation, leavingnot more than
about half a page showingabove the top cover. If necessary,press the
Paper Feed switch to feed paper forward until a perforation is located
just above the top cover, and tear there.
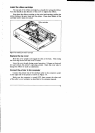
Press the Print Pitch switch on the control panel and hold it down.
Stillholding the Print Pitch switch down, press the Paper Feed switch.
The printer willautomatically feed the fanfold form backward until the
paper is completelyfree of the platen.
Move the releaselever to the down position.
Mount the paper guide in the upright position.
Now you can load singlesheets either semiautomaticallyor manually,
as explained previously. The fanfold paper remains parked at the back of
the printer.
When you want to resume using fanfold paper, the procedure is as
follows.
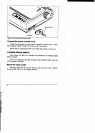
Paper unparking
1. Remove all sin~ sheets from the printer and close the paper bail.
2. Mount the paper guide in the horizontal position.
3. Move the release lever to the up position.
4. With power ON, move the bail lever forward. The printer will auto-
matically feed the parked fanfold paper into position for printing.
5. Move the bail leverback to closethe bail. Now you are ready to print.
TESTPRINTING
After loading paper, you can test the printer as described next.
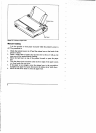
Short se/f test
This procedure prints a six-line“barber-pole” test pattern. The lines
are eight inches wide, so the paper should be at least that wide.
1. Check that paper is in position for printing.
2. With power off, pressthe On Line switch on the control panel and hold
it down.
3. Stillholding the On Line switch“down,turn the printer’s power on.
The printer willautomatically start printing its short test pattern. You
can release the On Line switch after printing starts. To remove the paper
at the end of the test; switch power OFF, then turn the platen knob. (Don’t
turn the platen knob whilepower is on.)
—
—
—
—
—
—
.
—
—
12
.