Printing Basics
4
User Manual
4-9
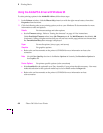
Using the Tektronix printer driver for Windows 3.1
To select printing options, follow these steps:
1.
From the
Control Panel
, double-click the
Printers
icon.
2.
In the
Printers
dialog box, choose your printer from the list of installed printers, then click the
Setup
button.
A dialog box appears with the name of the printer you selected across the top.
3.
From the
Setup
dialog box, click the
Options
button to see the
Options
dialog box. Refer to your
Microsoft Windows documentation for details on the options in this dialog box.
■
Make sure that the
Color
check box is
on
to print in color.
■
Select
one
of the following header options:
■
Make sure that the
Send Header with Each Job
check box is
on
(checked) to download
PostScript header information with each print job. This is the recommended setting.
■
Click the
Send Header
button. In the
Send Header
dialog box, select either
Printer
or
File
, and
click the
Send Now
button. This saves the PostScript header information in the printer. This
option makes print files a little smaller and faster, but you need to click the
Send Now
button
every time the printer is turned on.
4.
From the
Options
dialog box, click the
Advanced
button to see the
Advanced Options
dialog box.
Make sure the
Use PostScript Level 2 Features
check box is checked
on
.
Note
The
Use PostScript Level 2 Features
option affects the print time of bitmapped (raster) images by
improving the image transfer time from the computer to the printer, and by improving the image
processing time in the printer. This option is only available to applications that use this Tektronix
driver with Tektronix PostScript Level 2 printers. When this box is checked, the
Compress Bitmaps
option is unavailable (grayed-out).
5.
Click
OK
to return to the
Options
dialog box.
6.
In the
Options
dialog box, click the
Printer Features
button to see the
Tektronix Printer Features
dialog box. Make color correction, print quality, and other selections as desired. Use the
MP Manual
Feed Media
menu to select specialty media or double-sided printing. Click
OK
to return to the
Options
dialog box.
7.
Click
OK
to return to the dialog box that lists your printer’s name across the top. Make the following
printing selections:
Paper Source, Paper Size
,
Orientation
,
Copies
.
Note
You may want to set the number of copies from your application because the number of copies in the
Setup dialog box remains the same until you change it again. Also, if you are printing multiple pages,
make sure that the
Transmission Retry
(described on page 4-11) is set for at least 600 seconds
(10 minutes).


