Working with Reports
44
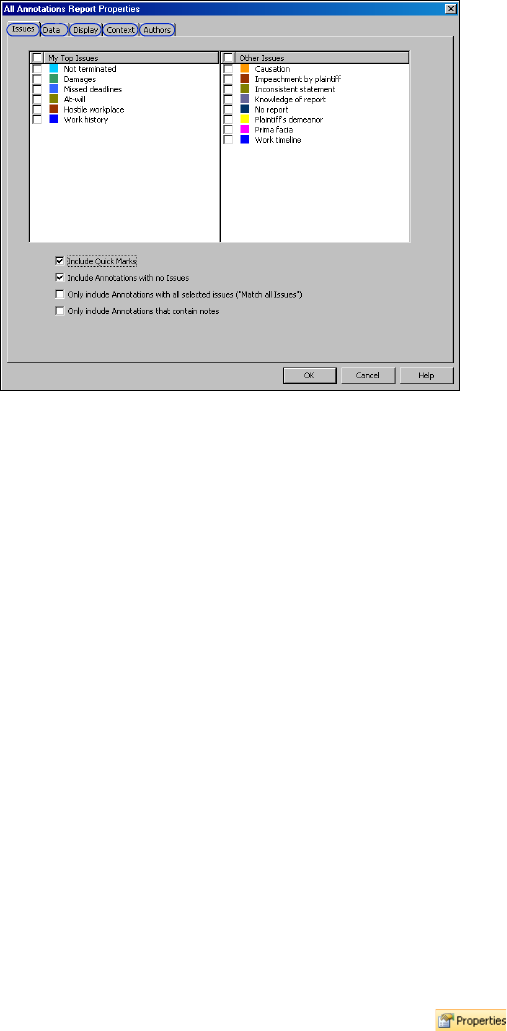
2. All of the issues in the case are selected on the Issues tab by default. To exclude an issue from the report, clear
its check box.
3. Clear the Include Quick Marks check box, if desired.
4. Clear the Include Annotations with no Issues check box, if desired.
5. Select the Only include Annotations with all selected issues (“Match all Issues”) check box, if desired.
6. Select the Only include Annotations that contain notes check box, if desired.
7. Click the Data tab to display a list of all document types and data. By default, all document types and data
are selected. To exclude a document type from the report, clear its check box. To exclude particular data from
the report, click the document type containing the data, then clear the check boxes for the data you want to
exclude.
8. Click the Display tab to view a list of display options. Type a title for the report in the Title text box, if
desired. Then select or clear the appropriate check boxes.
9. Click the Context tab to display a list of context options. Select or clear the appropriate check boxes.
10. Click the Authors tab to display a list of annotation authors. If you are working in a secured case on the
network, a list of all annotation authors is displayed. If you are working on the case off the network, just
LocalUser is displayed. Select or clear the appropriate check boxes.
11. Click OK. The Annotations report, which includes the lines you marked and the surrounding questions and
answers, is displayed on the Report tab in the right pane and listed under Report in the left pane.
Verbatim Digest Report
This is an Annotations report that includes only highlighted document text. To create a Verbatim Digest
report, first create an Annotations report. Then click the Properties button ( ) on the toolbar
above the report in the right pane to display the All Annotations Report Properties dialog box. Click the
Display tab. Clear all check boxes except the Highlight check box under Annotations, then click OK.
