


2
2-24 Color Calibration
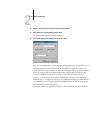
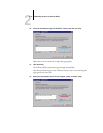
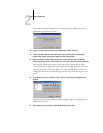
9. When the Status field indicates that the measurements were read successfully, click
Accept.
10. Click OK in the Measure dialog box.
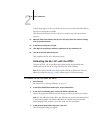
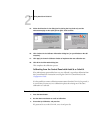
11. Click Apply in the Calibrator window to implement the new calibration set.
12. Click OK in the Information dialog box.
This completes the GA-1121 calibration process.
Using AutoCal and ColorCal
AutoCal and ColorCal allow you to calibrate the GA-1121 without the use of an
additional spectrophotometer or densitometer. Instead, these methods use the
copier/printer’s built-in scanner to measure toner density values. Using either AutoCal
or ColorCal provides an equally accurate calibration of the GA-1121.
AutoCal and ColorCal have the following differences:
• Scanner calibration—ColorCal lets you calibrate the scanner (copier feeder) using
the Kodak Color and Gray Scale strips. AutoCal lets you calibrate the copier using
the Kodak Gray Scale strip; scanner calibration is not available.
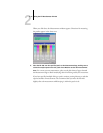
• Measurement page—For ColorCal, square black-and-white and color patches are
randomly printed on the ColorCal Measurement Page. This allows ColorCal to be
less influenced by copier conditions, providing greater accuracy in color
reproduction and calibration.
AutoCal is provided for compatibility with earlier GA-1121 servers. You can perform
AutoCal or ColorCal calibration from either ColorWise Pro Tools or the GA-1121
Control Panel. For troubleshooting during the AutoCal procedure, see the Job
Management Guide.
NOTE: To calibrate using AutoCal or ColorCal, you will need the Kodak Gray Scale
strip included in the customer media pack that came with your GA-1121. You also
need the Kodak Gray Scale strip and Kodak Color Control Patches strip to calibrate
the scanner of the copier/printer for ColorCal.