


3
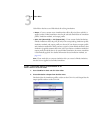
3-10 ColorWise Pro Tools
If you do not define a custom simulation profile, your job will print with CMYK
Simulation Profile set to None. If you do not define a custom RGB Source or Output
profile, the default profile is used.
Considerations for defining Output Profiles
The procedures for defining Output Profiles is similar to the preceding example for
defining Simulations profiles. However, note these differences:
For output profiles, the predefined custom names are Output-1 through Output-10.
When you choose Profile Settings for an output profile, the Use Calibration Set
options also appear. You must calibrate the GA-1121 with this calibration set before
this option has any effect. If you have never measured for this calibration set, default
measurements are used. For more information about calibration sets, see page 2-2.
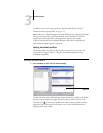
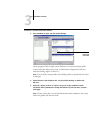
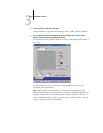
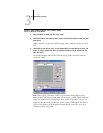
Color Editor
Color Editor allows you to customize simulation and output profiles. Access Color
Editor directly by clicking its icon in the ColorWise Pro Tools main window, or
indirectly, through the Profile Manager.
Editing profiles
Color Editor allows you to create custom profiles by editing existing simulation or
output profiles and saving the changes as a new profile. Use Color Editor to fine-tune a
profile on your GA-1121 to meet your exact specifications. For example, you can
create a custom profile for printing to a specific media type.
NOTE: You cannot edit source profiles; only simulation and output profiles can be
customized.
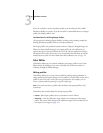
Color Editor has two Edit Modes for editing output profiles:
•
Custom—Edit output profiles and save customized versions of them.
•
% Density—View the calibration target, which is one component of the output
profile. You cannot make changes to the calibration target in this window, but you
can import a new target (see page 2-2).