


2
2-28 Color Calibration
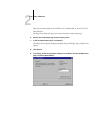
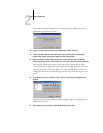
4. For Calibration Mode, choose Standard or Expert, and press Set.
With Expert Mode, you can print a Comparison Page (see page 2-7).
5. For Measurement Method, choose AutoCal or ColorCal, and press Set.
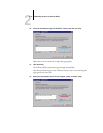
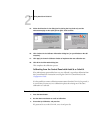
6. For Tray, choose the paper source for the patch page and press Set.
Choose LTR/A4 from the GA-1121 Control Panel.
NOTE: If you print a measurement page from the Manual Feed tray, you must load the
appropriate paper in the tray and select the correct paper size from the copier/printer
touch panel display.
7. Choose Calibrate, and press Set.
8. Select the Media and press Set.
Choose from the list of all calibration sets on the GA-1121. This prompt appears only
if more than one calibration set is available.
9. When prompted, choose Yes to print the measurement page.
This page is comprised of swatches of color that will be measured by the
copier/printer’s scanner and then compared to the target color values. After the page is
printed, the Measure Page screen appears.
10. Choose Yes in the Measure Page screen.
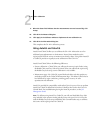
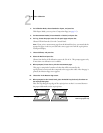
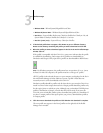
11. When prompted on the Control Panel, place the Kodak Gray Scale strip face-down on
the copier/printer glass.
Place the strip along the top edge of the copier/printer so that it is centered between
the paper width marks on the copier/printer.
Place color measurement page face
down over grayscale strip
Place grayscale strip face down