


3
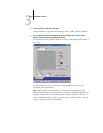
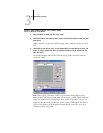
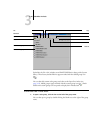
3-15 Color Editor
NOTE: You should adjust points in this way only after you have entered the Dot Gain
and Brightness values.
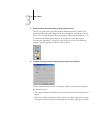
For greater precision, type percentages in the Input and Output fields or use the arrow
keys on the keyboard to adjust the curve. To use the arrow keys, you must first click the
curve to establish an anchor point that serves as a reference.
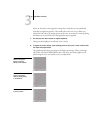
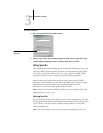
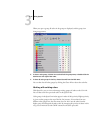
9. For an output profile, set maximum densities of the C, M, Y, and K channels.
Enter the maximum densities, called D-Max values, of individual colors for profiles
that support density settings. D-Max settings are not available when you edit
Simulation profiles in Master mode.
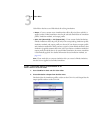
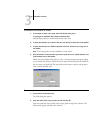
10. When you are finished, click Save and enter a name for the new profile.
The new custom profile is saved to the GA-1121 with the new name. If you edit one of
the press standard targets (for example, SWOP-Coated, DIC, or Euroscale), consider
including the original name as part of the new target name (for example, DIC-new) to
help you remember the source of the new target.
NOTE: Preset default profiles are locked and must be saved with a new name.
For Mac OS computers, custom profiles must be linked to one of the 10 predefined
custom profile names (Simulation-1 through Simulation-10 for Simulation, or
Output-1 through Output-10 for Output) to be accessible from the printer driver.
Create as many custom profiles as you want, but a maximum of 10 are available from
the printer driver at any one time. For information on linking custom profiles to the
predefined custom profile names, see “Defining profiles” on page 3-7. If you are using
the printer driver for Windows computers, custom profiles will appear in the driver
window without being associated with a predefined profile name.
If you set a custom profile as the default, you can access it from the printer driver
without linking it to one of the predefined custom names. Select Printer’s default from
the printer driver.