


3
3-4 ColorWise Pro Tools
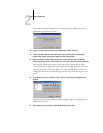
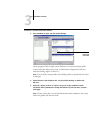
A small icon to the left of a profile name indicates the default profile for each category
(RGB Source, Simulation, and Output). If you designate a different profile as the
default, the icon appears next to your designated profile. The icon indicating the
default RGB Source and Output profiles looks like a target ( ). The icon indicating
the default Simulation profile changes in appearance depending on whether the default
RGB Separation setting is set to Simulation ( ) or Output ( ).
2. Select the profile you want as the default for a profile type and click Profile Settings.
3. In the Profile Settings dialog box, click Default and click Apply.
4. Click OK.
In the main Profile Manager window, the target icon appears next to the new default
profile you specified.
5. Repeat steps 2 through 4 for each type of profile.
If no default is set for RGB Source, the RGB Source print option is set to None. If no
default profile is set for Simulation, the CMYK Simulation print option is set to None.
For more information on print options, see Chapter 1.
The Output profile always has a default profile. To change the Output default, select a
preset profile you want as the default and click Profile Settings. Or create a new default
under a new name by selecting a preset profile and specifying your choice of the
calibration set in the Use Calibration Set menu and a new name in the Profile
Description menu.
Downloading profiles
The GA-1121 includes default profiles. You can download additional profiles from any
computer connected to the GA-1121.
TO DOWNLOAD A PROFILE
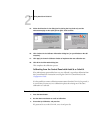
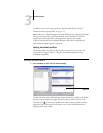
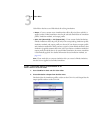
1. Start ColorWise Pro Tools and click the Profile Manager.
The left side of the main Profile Manager windows lists the ICC profiles in the default
location on your computer.
•
Windows 98/Me—Windows\System\Color
•
Windows NT 4.0—Winnt\System32 \Color