10
5. Installation
(
continued
)
5.6.3 Browser
(
continued
)
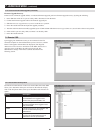
5.6.4 Non-Browser Clients
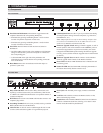
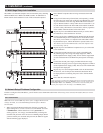
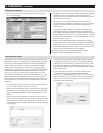
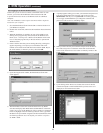
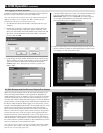
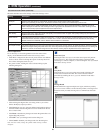
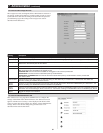
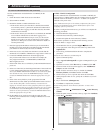
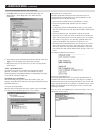
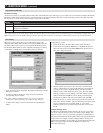
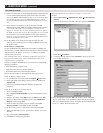
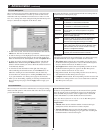
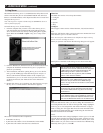
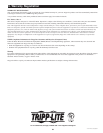
4. ClickontheNetwork icon at the top of the page to bring up the
Network settings page.
5. By default, the Obtain IP address automatically [DHCP] checkbox
is checked. To set a fixed IP address, check the Set IP address
manually [Fixed IP]checkboxintheIPv4orIPv6settingssection,
depending on your network.
6. TheIP Address, Subnet Mask and Default Gateway fields will
be activated upon checking the Set IP address manually [Fixed IP]
checkbox. Fill in these fields with information appropriate for
your network.
7. AswiththeIPAddresssettings,theDNSServersettingscanbe
obtained automatically or assigned manually. To manually enter
these settings, check the Set DNS server address manually checkbox
and fill in the Preferred DNS server and Alternate DNS server fields
with information appropriate for your network. Note: The Alternate
DNSserver field is optional.
8. WhenyouhaveenteredtheIPAddressandDNSServersettings,
click the Apply button. Clicking the Apply button will automatically
check the Reset on exit checkbox located in the Customization page
oftheWebManagementInterface.Whenyoulogout,theunitwill
be reset and your network changes will be applied.
See the Network Settings section in this manual for complete
information on the rest of the settings in this page.
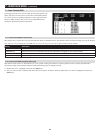
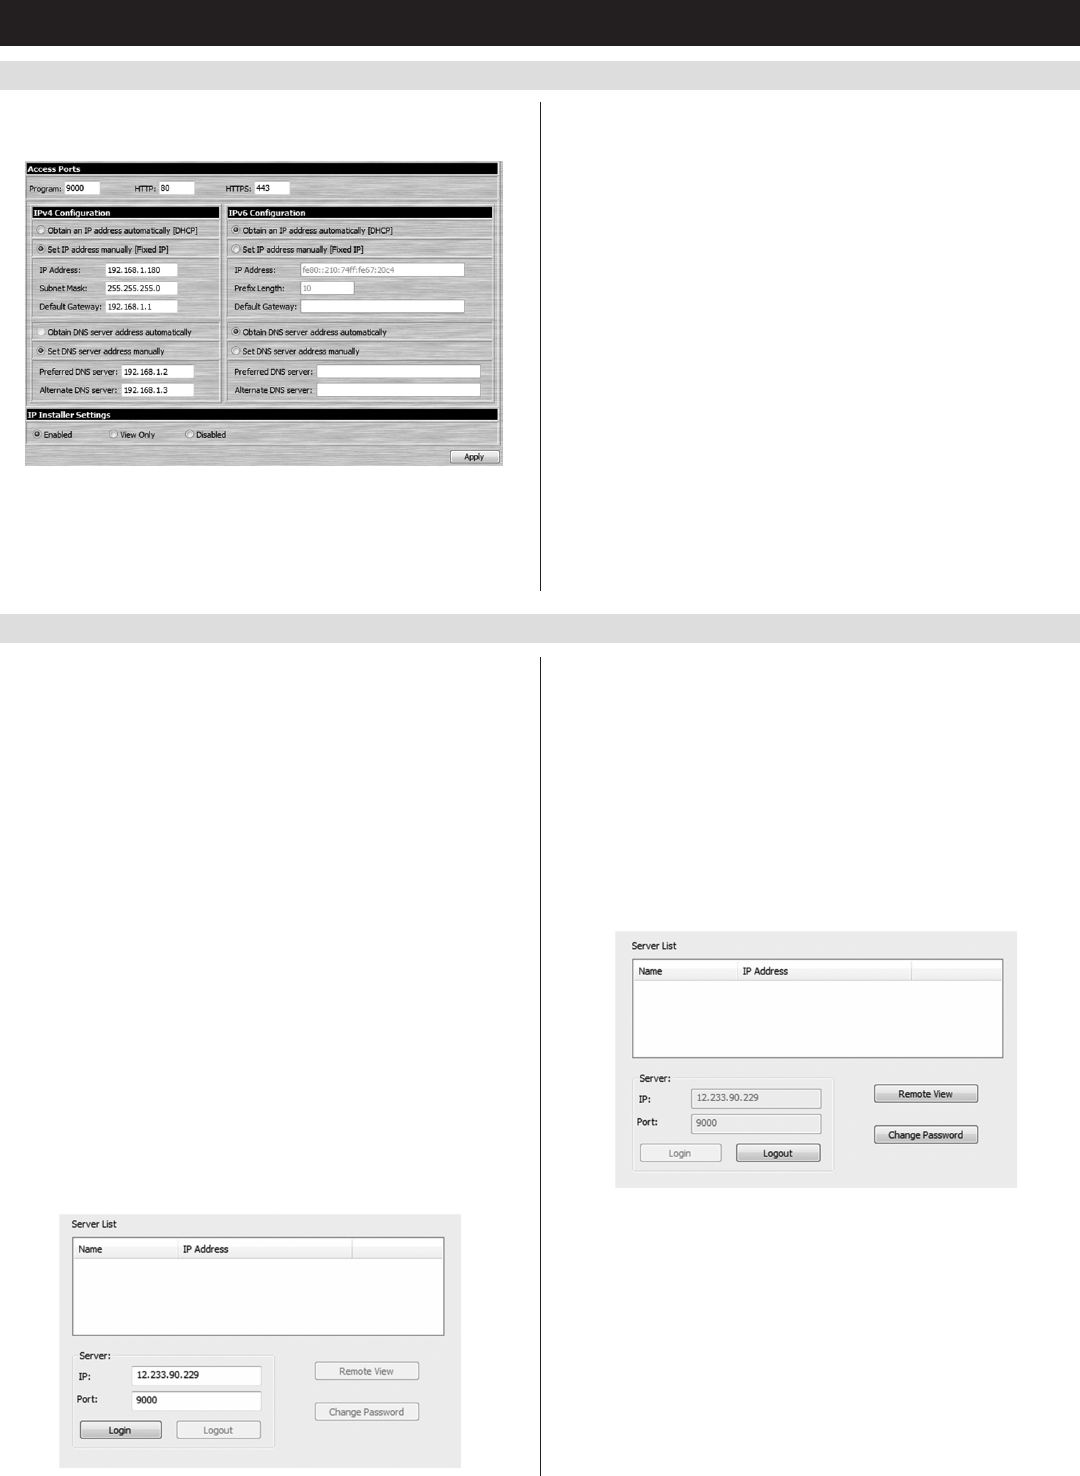
TheCDthatcomeswiththeproductincludesWindowsandJavaclient
applicationsthatallowyoutoremotelyaccesstheKVMwithoutusing
a web browser. The applications function the same, but the Windows
clientisdesignedforWindowscomputers,whereastheJavaclient
isdesignedforeitherWindowsornon-Windowscomputers.When
accessedfromacomputerthatisonthesamenetworkastheKVM,the
client will search the network for the device and display it in a device
list for you to access. If accessed from a computer that is not on the
samenetworkastheKVM,youmustobtaintheIPaddressfromyour
network administrator and manually enter it into the client. (See the
Browser section above for information on obtaining the IP address) To
usetheWindowsorJavaclienttoassignaxedIPaddress,followthe
steps below.
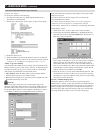
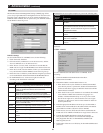
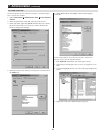
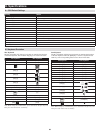
1. SavetheWindowsorJavaclientfromtheCDtoadesiredlocation
onyourcomputer.Double-clicktheletoopenit.
2. When accessing the Windows client for the first time, it will need to
be installed on your computer. Follow the installation prompts that
appear. Once installed, a Windows client icon will appear on your
desktop.
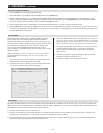
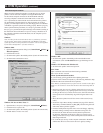
3. WhenaccessingeithertheWindowsortheJavaclientfortherst
time, you will be prompted to enter the product serial number, which
canbefoundontheCDthatcamewiththeunit.Onceentered,you
willnotbepromptedforitagain.Thenon-browserclientconnection
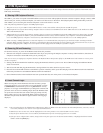
screen appears.
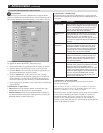
4. IfyouareonthesamenetworkastheKVM,theclientwilllocate
it and display it in the Device List. In this case, highlight the unit
in the Device List and click the Login button. If you are not on the
same network as the unit, it will not be displayed in the list. You
must manually enter the IP address in the IP Address field, and then
click the Login button.
5. Upon clicking the Login button, you will be prompted to enter
in a Username and Password. Enter the default Username
(administrator), and the default Password (password). The Logout
button, and the Remote View and Change Password buttons on the
rightofthenon-browserclientmainpagewillbeactivated.The
Login button will be deactivated.