43
7.3.2 Network
7. Administration
(
continued
)
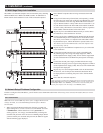
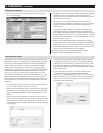
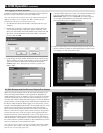
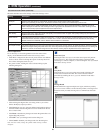
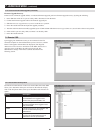
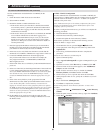
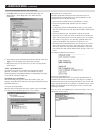
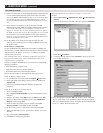
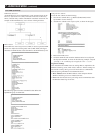
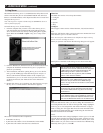
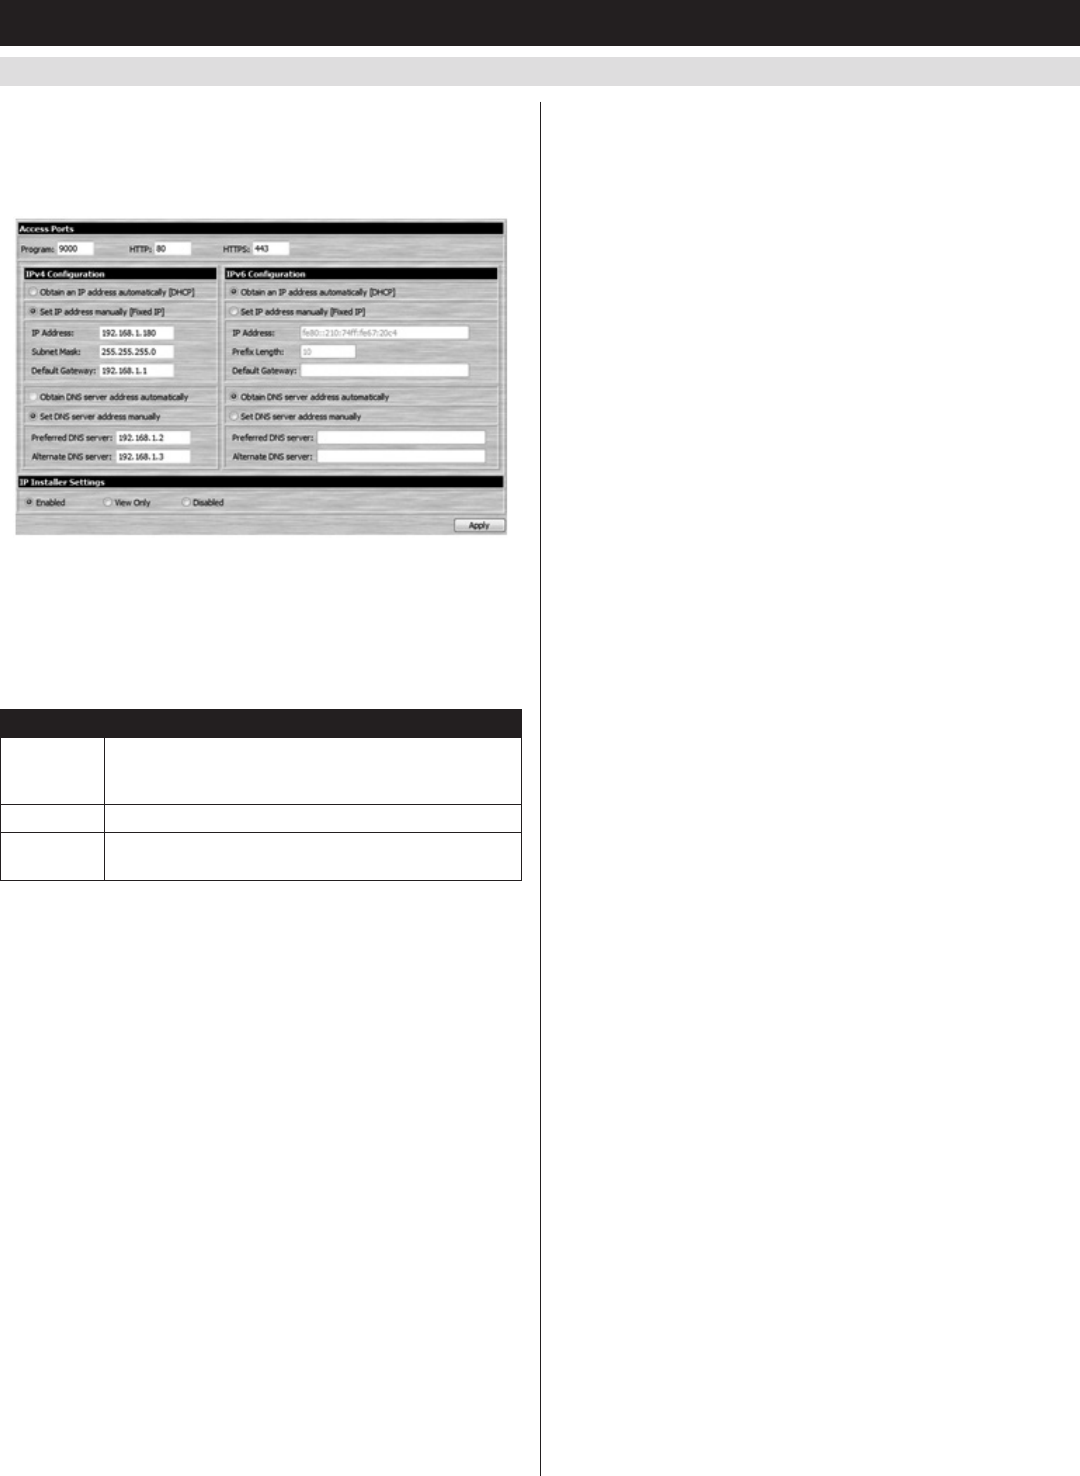
Clicking on the Network icon at the top of the screen brings you to the
Network page. From here you can set access ports that will be allowed
byafirewall,configuretheKVM’sIPaddressandDNSserveraddress,
and set the IP Installer settings. IP Installer settings can only be
changed using the Web Management Interface.
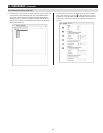
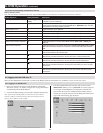
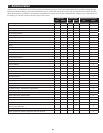
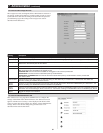
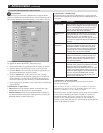
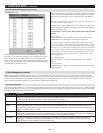
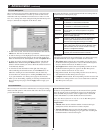
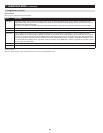
Access Ports
If a firewall is being used, these fields allow administrators to specify
port numbers that the firewall will allow. The firewall must be set to
allow access to these ports. If an invalid port number (or no port
number)isspecifiedinthefirewall,theKVMswitchwillnotbefound.
An explanation of the ports you can set via this page is given in the
table:
Port Description
Program This is the port number that must be specified when
connecting to the KVM via the AP Windows or Java
Cient. The default is 9000.
HTTP This port number is for a browser login. The default is 80.
HTTPS This port number is for a secure browser login. The
default is 443.
Note: A different value must be set for each access port. If there is no
firewall, it doesn’t matter what these numbers are set to, since they
have no effect.
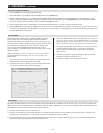
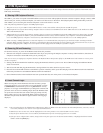
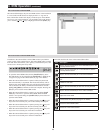
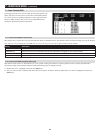
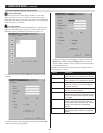
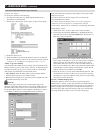
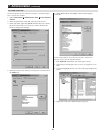
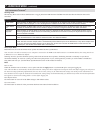
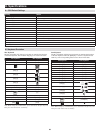
IP Address and DNS Server
TheKVM’sIPandDNSServeraddressescanbeassigned
automaticallybyaDHCPserver,orgivenafixedaddressbyan
administrator.Bydefault,theB022-U08-IPissettohaveanIPaddress
assignedautomaticallyviaDHCPserver.Ifthisisthecase,youwill
need to obtain the IP address from your network administrator. If
connectedtoanetworkwithoutaDHCPserver,itbootswithadefault
IPaddress.ThedefaultIPv4andIPv6addressescanbefoundonthe
sticker on the bottom of the unit. Follow the steps below to configure
theKVM’sIPv4orIPv6settingsaccordingly,dependingonyour
network.
1. TohavetheIPaddresspulledautomaticallyviaDHCPserver,make
sure that the Obtain an IP address automatically [DHCP] option is
selected.
2. To assign a fixed IP address, make sure the Use the following IP
address [Fixed IP] option is selected.
3. Fill in the IPv4 or IPv6 Configuration fields with information
appropriate to your network.
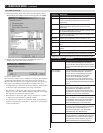
4. IfyouhavesettheIPaddresstobepulledviaDHCPserver,you
caneitherchoosetoassigntheDNSserveraddressviaDHCPas
well,orassignafixedDNSserveraddress.Ifyouhaveassigneda
fixedIPaddressfortheKVM,youmustalsoassignafixedDNS
serveraddress.TohavetheDNSserveraddresspulledviaDHCP
server, make sure that the Obtain DNS server address automatically
optionisselected.ToassignafixedDNSserveraddress,makesure
that the Using the following DNS server address option is selected.
5. Fill in the Primary DNS server and Alternate DNS server fields
with information appropriate for your network.
Note: Specifying the primary DNS Server address is mandatory. The
alternate DNS Server address is optional.
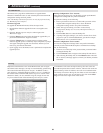
6. Afterallchangeshavebeenmade,makesurethattheReset on exit
checkbox in the Customization screen is checked. This checkbox
should automatically be checked anytime network settings have
been changed.
7. ExittheremotesessionandlogoutoftheKVMswitch.Upon
loggingoutoftheKVM,apromptwillappearstatingtheKVM
willbereset.UponcompletionoftheKVMreset,thenewnetwork
settings will be saved.