


7-2
prompts or error messages will make it easier for the user to
distinguish between them.
• Be sure to record error messages for all possible problems that
the user may encounter during a session. Once the operator
becomes accustomed to listening to the voice prompts, it may
become easy to overlook a “display only” error message.
802 RF Terminal’s Voice Message Mapping
The 802 RF Terminal is shipped with 75 seconds of total recording time.
The time allotted for each message is partitioned as follows:
30 – ½ second messages (message numbers 01-30)
30 - 1 second messages (message numbers 31-60)
15 - 2 second messages (message numbers 61-75)
Messages are sequentially numbered beginning with the ½-second
messages, followed by the 1-second messages, and finally the 2-second
messages. You can change the partitions to allow for more or less of a
particular length message. For example, if you decide you do not want any
½ second messages and you want 15 more 1-second messages, your
allocation would look like this:
00 – ½ second message
45 - 1 second messages (message numbers 01-45)
15 - 2 second messages (message numbers 46-60)
Voice message partitions are set in the 802 RF Terminal either from the bar
coded Setup Menu or by the keypad setup. From the Setup Menu, scan the bar
code for “Voice Messages”, and then scan six digits. The first 2 digits
correspond to the ½ second messages, the second 2 digits for the 1-second
messages and the last 2 digits for the 2-second messages. See Chapter 2; RF
System Setup for details on Terminal setup (by bar code setup menu and
keypad). Remember that the total amount of time must add up to 75 seconds.
Programming Voice Messages
To record and playback messages you have to get to SETUP MODE and
enter the password. If you don’t know how to do this, see Chapter 2; RF
System Setup for details on how to get into the SETUP MODE. Once you
have entered the password (password is “WDTRI”) you will see the
following prompt:
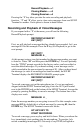
R/F Terminal Setup->1
Voice Operations---->2
Press 2 to select Voice Operations. The next screen gives you your options: