


7-4
your language) into the microphone of the 802 RF Terminal. When ready,
press the ENTER key and the instant you release it, speak ITEM into the
microphone. Remember to speak clearly – you have plenty of time to say
ITEM in ½ second. When the message time is over, you will hear two
beeps. The display is back to the RECORD/PLAYBACK prompt:
RECORD/PLAYBACK?
KEY [R/P]?
Now you’re ready to listen to your first recording. Press the P key and key
in 03 for the message number. Do not be discouraged if you didn’t record
the entire message. Our first attempt produced “EM” in a very frantic tone
of voice. Practice speaking clearly and calmly (think of the poor guy who
has to hear it 10,000 times next week) as soon as the key is released. You
will get the hang of it with just a little practice.
That is the way all messages – prompts and errors - are recorded. If you are
not sure which message numbers are blank, you can listen to messages until
you find a blank for recording.
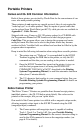
The host computer relies on the fact that the voice messages are stored in
the 802 RF Terminal itself and not generated by the host. The host
computer will trigger the broadcast of a voice message by sending a prompt
to the 802 RF Terminal that tells it which message number to play. If the
host thinks that message #05 is STOP when it’s really GO, it can cause
confusion for the operator. That is why it is important to keep track of what
messages are recorded where.
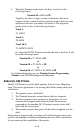
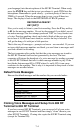
Default Voice Messages
Here are the default messages and the numbers they are recorded under:
Message Recorded Message #
Prompts
ITEM #01
QUANTITY #02
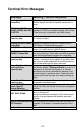
Error messages
LOW BATTERIES #31
CHANGE BATTERIES #32
TERMINAL OUT OF RANGE #33
SERVER NOT AVAILABLE #34
Cloning Voice Messages and Setup from 802 RF
Terminal to 802 RF Terminal
If you have several 802 RF Terminals, you can record all of your voice
messages in one 802 RF Terminal and then simply “clone” them to your
other 802 RF Terminals. Cloning also copies the 802 RF Terminal setup
(except for Terminal ID).