


Prestige 202H User’s Guide
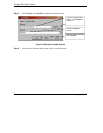
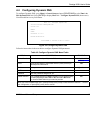
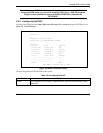
5-2 ISDN Setup
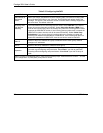
Table 5-1 Menu 2 ISDN Setup
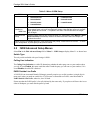
FIELD DESCRIPTION
♦ Switch/Unused
♦ Switch/Switch
♦ Switch/Leased
♦ Leased/Switch
♦ Leased/Unused
♦ Unused/Leased
♦ Leased/Leased
Telephone
Number(s)
IDSN Data
Enter the telephone number(s) assigned to your ISDN line by your telephone company.
Some switch types only have one telephone number. Note that the router only accepts
digits; please do not include ‘–’ or spaces in this field. This field should be no longer
than 25 digits.
Edit Advanced
Setup
Advanced Setup features are configured when you select Yes to enter Menu 2.1-ISDN
Advanced Setup (see ahead). Refer to the Advanced Phone Services Chapter for
detailed information.
When you have completed this menu, press [ENTER] at the prompt “Press ENTER to Confirm…” to save
your configuration, or press [ESC] at any time to cancel.
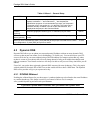
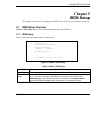
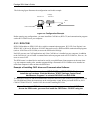
5.2 ISDN Advanced Setup Menus
Select Yes in the Edit Advanced Setup field of Menu 2 – ISDN Setup to display Menu 2.1 as shown later.
Switch Type
The only switch available with your Prestige is DSS-1.
Calling Line Indication
The Calling Line Indication, or caller ID, determines whether the other party can see your number when
you call. If set to Enable, the router sends the caller ID and the party you call can see your number; if it is
set to Disable, the caller ID is blocked.
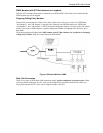
PABX Outside Line Prefix
A PABX (Private Automatic Branch eXchange) generally requires you to dial a number (a single digit in
most cases) when you need an outside line. If your router is connected to a PABX, enter this number in
PABX Outside Line Prefix, otherwise, leave it blank.
Please note that the PABX prefix is for calls initiated by the router only. If you place a call from a device on
either A/B adapter, you must dial the prefix by hand.