


Chapter 6 Tutorials
ZyWALL USG 300 User’s Guide
128
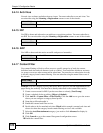
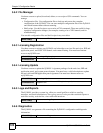
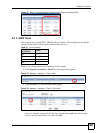
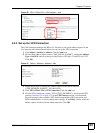
Figure 48 Network > Interface > Ethernet > ge4
3 Use the default values for the rest of the settings. Click Apply to save these changes and
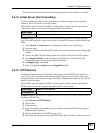
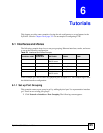
return to the previous screen. Click the Edit icon for ge5, and set up the IP address as
shown below.
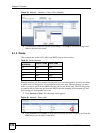
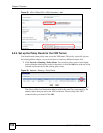
Figure 49 Network > Interface > Ethernet > ge5 > IP Address Assignment
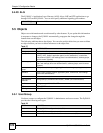
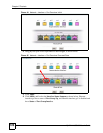
4 Scroll down to the DHCP Setting section, and set up the DHCP server for ge5, as shown
below.
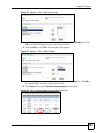
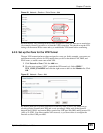
Figure 50 Network > Interface > Ethernet > ge5 > DHCP Setting
5 Use the default values for the rest of the settings. Click Apply to save these changes and
return to the previous screen.
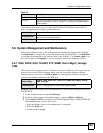
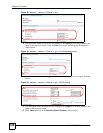
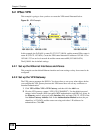
6 Click Status and look at the Interface Status Summary, shown below.