23
10. Administrator Utility
Select a group membership for the user. If you do not wish to create a
group membership for the user, then select the default group account
(Group). Note: Each user account can have only one group membership.
If you want to assign KVM port access rights to the user, follow the steps
below. If not, skip ahead to . Note: There is no need assign port access
rights for Super Administrators and Administrators; they have access to all
KVM ports in the B060-032-8 installation, including those in cascaded/
daisy-chained KVM switches. There is also no need to assign access
rights for a user to any KVM port that cascades a B060-032-8. However,
you must assign access rights to KVM ports that cascade B007-008 KVM
switches. When you assign access rights to a KVM port that cascades a
B007-008 KVM switch, the access rights apply to all computers/servers
connected to it. There will only be one port available to assign access to
for daisy-chained KVM switches. Access assigned to this port will grant
identical access to every daisy-chained KVM switch in the installation, as
well as all ports on the daisy-chained KVM switches.
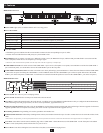
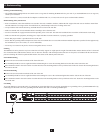
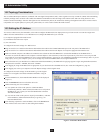
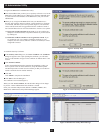
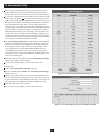
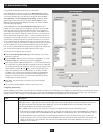
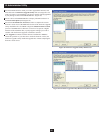
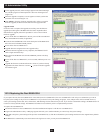
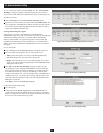
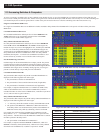
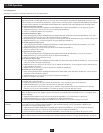
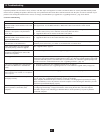
The User Information Web Page lists all KVM ports in the installation.
KVM ports, whether on the root station, daisy-chained, or cascaded, are
listed in order of position in the installation. Click to apply the type of
access rights you wish to assign for the user to each KVM port. Note:
Users granted access to a daisy-chained B060-032/B060-016-2 or a
cascaded B007-008 will have access to all of the ports on that KVM.
Users granted access to daisy-chained B060-032 or B060-016-2 KVMs
will also have access to all lower-level KVMs in the daisy chain, as well
as their corresponding ports.
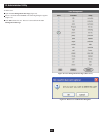
Click Save. The new user is added to the User Management Web Page
with the access rights you have assigned.
To exit without saving changes, click any other menu or icon.
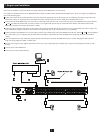
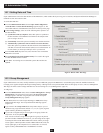
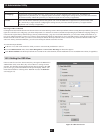
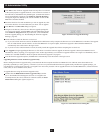
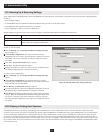
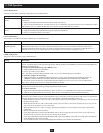
To modify users:
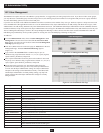
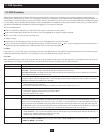
Open the User Management Web Page (Figure 16).
Select a username and click Modify. The User Information Web Page
appears (Figure 17).
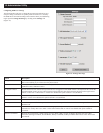
Edit the user account settings. (Leave the password fi elds blank to keep
the same password.) Note: Modifying the user’s password, account type,
or group membership will automatically end the user’s session if they are
currently logged onto the B060-032-8 OSD or Administrator Utility.
Click Save. The user account is updated.
To exit without saving changes, click any other menu or icon.
6
9
10
7
8
9
1
2
3
4
5
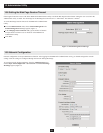
Figure 17: User Information Web Page (Access Rights Assigned)
Figure 16: User Management Web Page (Modify User)