43
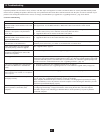
11. OSD Operation
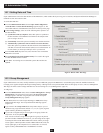
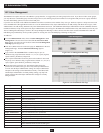
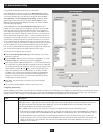
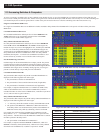
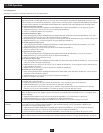
Station Management
This menu is accessible to both Super Administrators and Administrators.
Setting Description
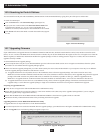
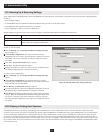
CREATE STATION This setting allows Super Administrators and Administrators to create a unique name to the B060-032-8 station. To create a
NOTE station note:
1. Highlight the CREATE STATION NOTE option and hit the enter key.
2. Type in the desired Station Note. Port Notes may be up to 15 characters long and can consist of any combination of letters
and numbers (A-Z, 0-9). Hit the ENTER key to save the port note or hit the ESC key to abort.
DELETE STATION This setting allows the Super Administrator or Administrator to delete the Station Port Note. To delete the Station Note:
NOTE 1. Highlight the DELETE STATION NOTE option and hit the ENTER key.
2. Press Y to confi rm the delete or N to abort.
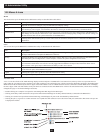
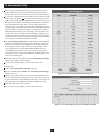
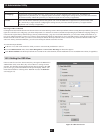
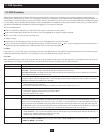
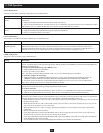
System Information
This setting is accessible to both Super Administrators and Administrators.
Setting Description
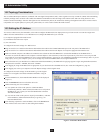
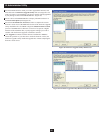
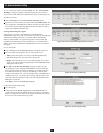
SYSTEM This setting differs from the System Information screen in the B060-032-8 Administrator Utility. It displays a list of all
INFORMATION B060-032-8 KVM switches, as well as connected Console Interface Units (CIUs) and Server Interface Units (SIUs).
Important information about each device is displayed, such as the KVM console or port number to which the device is
attached, the device type, the original fi rmware version and the most recent fi rmware upgrade version.
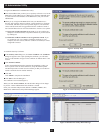
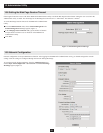
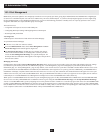
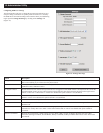
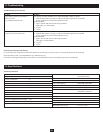
SADM Confi guration
This menu is only accessible to Super Administrators.
Setting Description
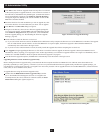
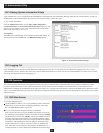
SET NETWORK This function allows Super Administrators to confi gure the network settings for the B060-032-8 on the Local Area Network
(LAN). A submenu appears with the following settings; DHCP, MANUAL IP ADDRESS, HTTP PORT, HTTPS PORT and
IP INSTALLER SETTING.
To enable dynamic IP addressing with a DHCP server:
1. Highlight DHCP and hit the ENTER key.
2. Press Y for enable or N for disable.
Note: The default is disabled. When enabled, a DHCP server will automatically pull an IP address.
To manually confi gure the IP Settings:
1. Highlight MANUAL IP ADDRESS and hit the Enter key. A page opens up displaying the following settings; IP
ADDRESS, SUBNET MASK, GATEWAY, PRIMARY DNS SERVER and ALTERNATE DNS SERVER.
2. Select each choice and enter the corresponding numerical address as given to you by your network administrator.
Note: These settings do not need to be confi gured if DHCP is enabled.
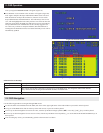
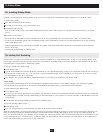
SET CLOCK This function allows Super Administrators to set the date and time for the B060-032-8. When selected a sub-menu is
displayed that includes the following settings; SET DATE and SET TIME.
To set Date and Time:
1. Highlight SET DATE and hit the ENTER key. Enter the date in YYYY-MM-DD format and press the ENTER key.
2. Highlight SET TIME and hit the ENTER key. Enter the time in HH:MM:SS format and hit the ENTER key.
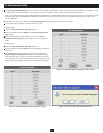
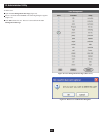
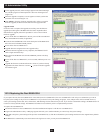
BROADCAST Selecting BROADCAST invokes Broadcast mode. When invoked, commands sent from the KVM console keyboard are
broadcast to all available computers in the installation. This is particularly useful for operations that need to be performed on
multiple computers, such as performing a system wide shutdown, installing/upgrading software, etc.
• While Broadcast mode is in effect, a speaker symbol appears before the port ID display of the KVM port that currently has
the KVM console focus.
• While Broadcast mode is in effect, other KVM consoles will not be able to control the computers; however, they will be
able to access the KVM ports in View-Only mode.
• While Broadcast mode is in effect, a message indicating such displays across the bottom of the Super Administrator’s
OSD screen.
• Mouse commands will not be broadcast.
• If the Super Administrator that invoked Broadcast mode is idle for longer than the period of time set for Idle Timeout,
Broadcast mode is canceled. (See Idle Timeout on page 40 for details).
• If the Super Administrator that invoked Broadcast mode opens their OSD for longer than 30 seconds while in Broadcast
mode, Broadcast mode will be canceled.
• To exit Broadcast mode, enter the OSD, highlight the Broadcast option and hit the ENTER key.