41
11. OSD Operation
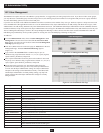
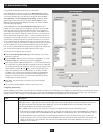
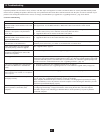
11.5 Management Menus
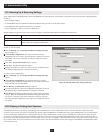
Group Management
Setting Description
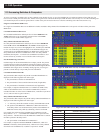
CREATE GROUP Selecting this setting opens up a page where all of the Groups are listed. To create a new Group simply hit the ENTER key,
(Super Admin Only) regardless of what Group is currently highlighted. The New Group Name Field will appear, allowing the user to type in the
desired Group name. The group name may be up to 15 characters long, and can consist of any combination of letters and
numbers (A-Z, 0-9).
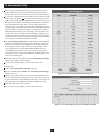
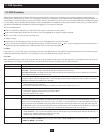
MODIFY GROUP Selecting this setting opens up a page where all of the Groups are listed. To modify a Group name, highlight the desired group
(Super Admin Only) and hit the ENTER key. The modify name fi eld appears, allowing the user to type in the desired Group name. The group
name may be up to 15 characters long, and can consist of any combination of letters and numbers (A-Z, 0-9).
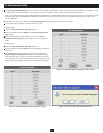
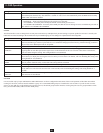
DELETE GROUP Selecting this setting opens up a page where all of the Groups are listed. Highlight the group you wish to delete and hit the
(Super Admin Only) ENTER key. You will be prompted to confi rm Y (to delete) or N (to cancel). Note: Deleting a group deletes all users in that group.
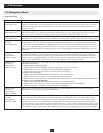
GROUP ACCESS Selecting this setting opens up a page where all of the Groups are listed. Highlight the group you wish to assign access to and
SETTING hit the enter key. A list of all of the KVM ports appears. Highlight the KVM port you want to assign access to and hit enter.
(Super Admin Only) To access ports of a cascaded B060-032-8, highlight the port that is connected to the cascaded KVM and hit the L key (For
lower level). To get back to the upper level KVM, hit the U key. A list of 3 options appears; None (No Access), View (View-
Only Access) and Full (Full Access). Select the access you wish to assign and hit the ENTER key. Repeat these steps for all
KVM ports.
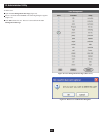
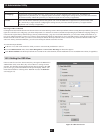
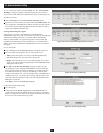
CREATE USER Selecting this setting opens up a screen where all of the Groups are listed. Select the group you want to add the new user
ACCOUNT to and hit the ENTER key. A screen will appear asking you to type in the username and password, as well as confi rm the
(Super Admin & password. The username and password may be up to 15 characters long, and can consist of any combination of letters and
Admin Accessible) numbers (A-Z, 0-9). Press the ENTER key to add the new user. Note: User names and passwords created in the OSD will
appear in ALL CAPS and must be entered in ALL CAPS when logging in to the Administrator Utility.
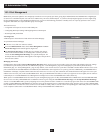
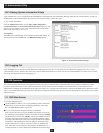
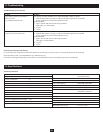
MODIFY USER Selecting this setting opens up a screen that gives you 3 options; RESET USER PASSWORD, CHANGE USER TYPE and
ACCOUNT CHANGE USER GROUP.
(Super Admin & To change a user’s account password:
Admin Accessible) 1. Highlight RESET USER PASSWORD and press the ENTER key. A list of users appears.
2. Highlight the user you wish to modify the password of and hit the ENTER key.
3. Enter in the new password, then re-enter it to confi rm. Press the ENTER key.
To change a user’s User Type:
1. Highlight CHANGE USER TYPE and hit the ENTER key. A list of users appears.
2. Highlight the user who’s User Type you wish to change and hit the ENTER key.
3. Highlight the User Type (Normal User, Administrator, Super Administrator) you want to change to and hit the ENTER key.
To change a user’s Group Membership:
1. Highlight CHANGE USER GROUP and hit the ENTER key. A list of users appears.
2. Highlight the user who’s Group you wish to change and hit the ENTER key. A list of groups appears.
3. Highlight the group you want the user assigned to and hit the ENTER key.
DELETE USER Selecting this setting opens up a page where all of the users are listed. Highlight the user you want to delete and hit the
ACCOUNT ENTER key. Press Y to confi rm or N to cancel the deletion.
(Super Admin &
Admin Accessible)
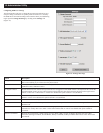
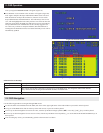
USER ACCESS Selecting this setting opens up a page where all of the users are listed. If you want the user’s access rights to be determined
SETTING by the group they’re in, you do not have to assign individual user access. Highlight the user you wish to assign access to
(Super Admin & and hit the enter key. A list of all of the KVM ports appears. Highlight the KVM port you want to assign access to and hit
Admin Accessible) ENTER. To access ports of a cascaded B060-032-8, highlight the port that is connected to the cascaded KVM and hit the L
key (For lower level). To get back to the upper level KVM, hit the U key. A list of 4 options appears; None (No Access), View
(View-Only Access), Full (Full Access) and Group (Group Access). Select the access you wish to assign and hit the ENTER
key. Repeat these steps for all KVM ports. Note: When both are set, User Access Settings supercede Group Access Settings.