


61
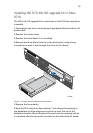
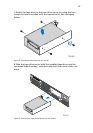
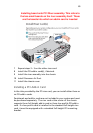
Removing a Slim line Optical Drive from Altos
R710
1 Power down the server system and unplug all peripheral devices
and the AC power cable.
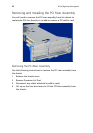
2 Remove the chassis cover.
3 Remove the front bezel.
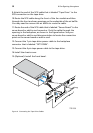
4 Open the connector on the rear of the CD-ROM by pulling up on
the connector.
5 Disconnect the data cable from the rear of the CD-ROM, or DVD-
ROM drive.
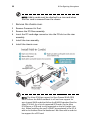
6 Push in on the blue lever at the rear of the drive carrier Remove
the drive carrier at the left side of the chassis to release the drive
carrier.
7 Slide the drive carrier out through the front of the chassis.
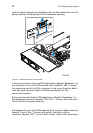
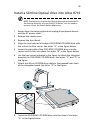
8 Disconnect the interposer board by removing the two screws for a
CD-ROM or DVD ROM.
9 Press downward on the side of the tray and release the drive from
the tray. Lift the Optical Drive out of the CD-ROM Carrier.
10 Store the tray for future use.
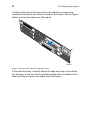
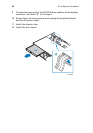
11 Install Slimline filler panel.If installing a new Optical Drive start
from step “Install a Slimline Optical Drive into Altos R710”.
12 Install Slimline filler panel.
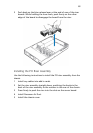
13 Install the chassis cover.
14 Install the front bezel.