


4 Configuring the system
54
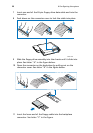
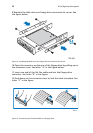
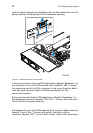
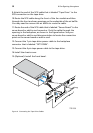
with the matching holes on backplane. Be sure the board seats into the
plastic retainer at the bottom of the backplane opening.
Figure 2. Installing the Sixth Drive Board
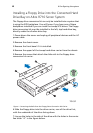
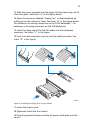
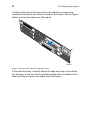
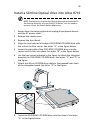
7.Connect the end of the long SCSI cable that is labeled "Backplane" to
the connector on the sixth drive board that is labeled "M/B." Connect
the remaining end of the SCSI connector to the server board or add in
card. See server board or add in card documentation for the
connection location.
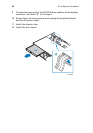
8.Connect the end of short SCSI cable that is labeled "Backplane" to
the backplane connector labeled "SCSI CH A." Connect the other end
to the sixth drive board connector.
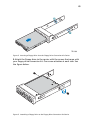
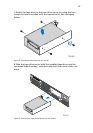
9.Included with your sixth HDD upgrade kit is a power cable connector
labeled "Drive 5 Pwr." Connect one end of this cable into the
connector labeled "OPT" on sixth drive board. Connect the remaining
TP01084