


43
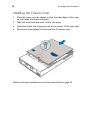
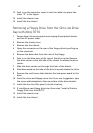
Installing a hard disc
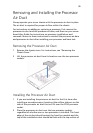
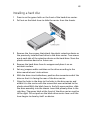
1 Press in on the green latch on the front of the hard drive carrier.
2 Pull out on the black lever to slide the carrier from the chassis.
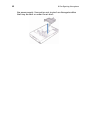
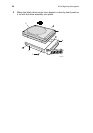
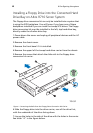
3 Remove the four screws that attach the plastic retention device or
the previously installed hard drive to the drive carrier. Two screws
are at each side of the retention device or the hard drive. Store the
plastic retention device for future use.
4 Remove the hard drive from its wrapper and place it on an
antistatic surface.
5 Set any jumpers and/or switches on the drive according to the
drive manufacturer’s instructions.
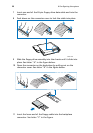
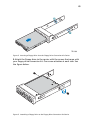
6 With the drive circuit-side down, position the connector end of the
drive so that it is facing the rear of the drive carrier.
7 Align the holes in the drive to the holes in the drive carrier and
attach it to the carrier with the screws that were attached to the
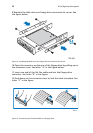
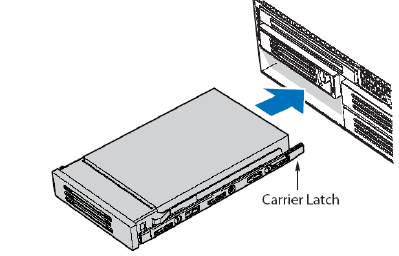
plastic retentiWith the black lever in the fully open position, slide
the drive assembly into the chassis. Insert the primary drive in the
right bay. The green latch at the front of the drive carrier must be
to the right. Do not push on the black drive carrier lever until the
lever begins to close by itself. on device.