You must re-enter your access password to make any further changes to the printer
settings.
Controlling IP Access
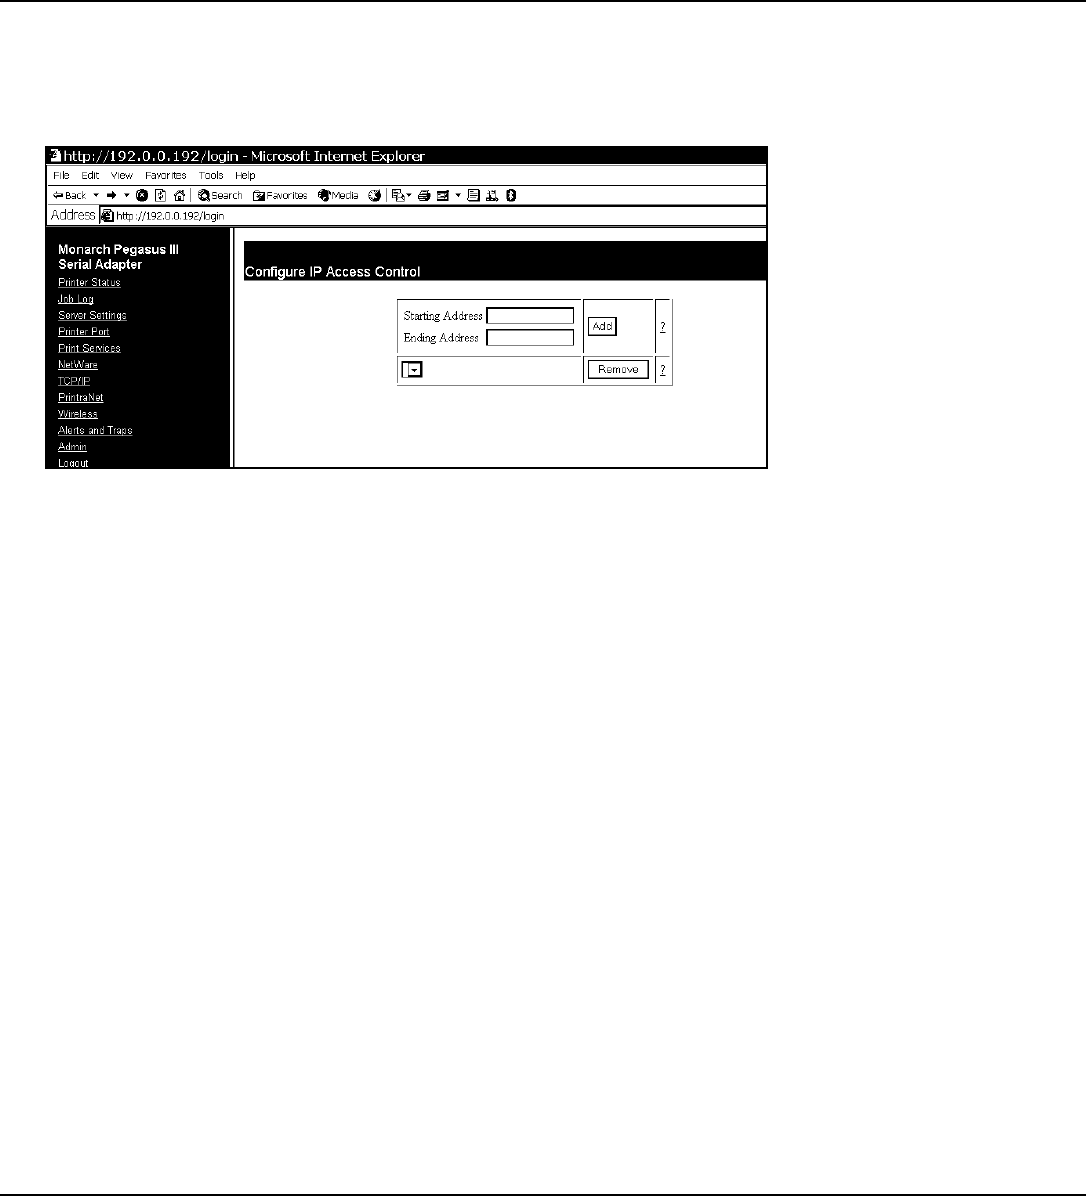
1. You can limit which remote hosts are able to access the printer by setting up an IP address
range.
2. From the side menu, click Admin. The Web Admin Configuration screen appears.
3. Click Configure IP Access Control.
To Add Hosts:
You can specify the valid range of remote IP addresses.
1. Enter a range of remote IP addresses that are allowed access to the printer. Any requests
from hosts outside this range are rejected.
2. Click Add.
3. Click the reset link at the bottom of the screen. The Reset Server screen appears.
4. Click Submit and wait five seconds for the print server to reset.
Even though you submitted your changes, they do not take effect until you reset the print
server.
You must re-enter your access password to make any further changes to the printer
settings.
5. The range of accepted IP addresses is listed in the drop-down menu.
To Remove Hosts
You can remove a range of remote IP addresses.
1. Select a range from the drop-down menu.
2. Click Remove.
3. Click the reset link at the bottom of the screen. The Reset Server screen appears.
4. Click Submit and wait five seconds for the print server to reset.
Even though you submitted your changes, they do not take effect until you reset the print
server.
You must re-enter your access password to make any further changes to the printer
settings.
Configuring Network Security
You can enable or disable network security, assign WEP keys, set up a User ID and password,
select an authentication protocol, and more. See “Basic Security Configurations” for more
information.
1. From the side menu, click Admin. The Web Admin Configuration screen appears.
2. Click Configure Network Security.
Using a Web Browser 4-13
