


28
This entire process takes approximately 60 minutes. First time maybe a little longer.
AFTER ASSEMBLY
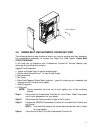
4.7 BACK GAGE AND CHAD CONTROL MECHANISM -
ADJUSTMENT, ASSEMBLY / DISASSEMBLY PROCEDURE
The Back Gage with Chad Control Mechanism is available as a kit service.
General Description:
The Professional Puncher-A1 Chad Control Mechanism directs Paper Chad into the
Chad Disposal Container, significantly reducing the amount of Chad that could flow
through the paper path. There will be some Chad that falls outside the Chad
Container. For example, when the customer changes their Die Set, some Chad
always comes with the Die and falls to the bottom of the machine or to the floor. As a
general practice, it is a good Preventative Maintenance practice to vacuum the inside
of the Professional Puncher-A1 periodically.
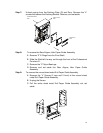
What you need to install this kit: Contents of Kit:
• Open End Ignition Wrench – ¼”
• Nut Driver, 5/16”
• Nut Driver ¼”
• Needle Nose Pliers (Side Cutters)
• Allen Wrench (for 4-40 SHS – 3/32”)
• Wire Cutters
• Wire Tie Wraps (Qty. 5)
• Screw Driver, Phillips Head
• Screw Driver, Flat Head, Small
• Back Gage #7706972
• E-Prom #7706791, 7706799
• Brush #7706711
• Holder #7706476
4.8 INSTALLATION STEPS
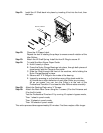
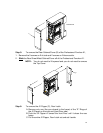
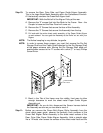
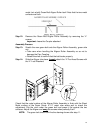
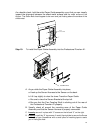
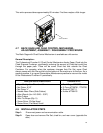
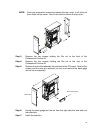
Step 1: Disconnect power and communication cable.
Step 2: Open door and remove Die Set, chad bin, and rear cover (opposite the
door).