


31
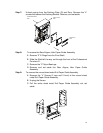
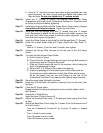
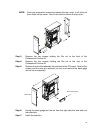
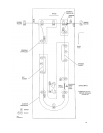
8. Clear paper from all these areas by turning knobs as shown.
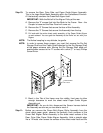
9. When all the paper is cleared turn on power shut the door make sure the jam
light is out if not go back to step 1. And find the paper that is not clear.
10. When all the paper is cleared from the punch and the light is out follow the steps
used above to clear the printer and finisher.
11. Hit the punch green button and then the resume button on the printer, operation
should start.
12. If by chance you do not hit the green button the punch will go into bypass mode
at this time you will have to hit the stop button on the printer hit the green button
on the punch then the resume button on the printer.
13. This is only my way to clear a jam after you become more familiar with the punch
this procedure can change to your own refinement.
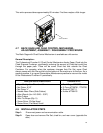
4.10 SOFTWARE UPDATE PROCEDURE (VERSION 10)
SOFTWARE UPDATE PROCEDURE (Version 1.0)
Tools Required:
• USB to DB9 female crossover cable.
• Computer with USB port and Hyper Terminal Software
• Download new firmware for installation and bootload.ht setup file.
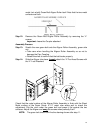
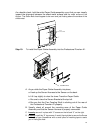
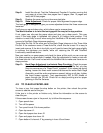
Remove plastic cover from 9 pin connector on back of Professional Punch A1
Connect cable from computer to this 9 pin connector.
Run Hyper Terminal software.
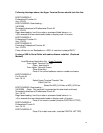
From Hyper Terminal File Tab
Open: bootload.ht
From Hyper Terminal Screen
Press ENTER Key on Keyboard
Press V for current software version number
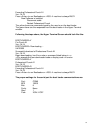
From Hyper Terminal Transfer Tab
Select Send Text File
Select new *.hex file to install
Numbers under the BOOTLOADER> prompt will increment as the download
continues.
When finished, press V on keyboard to display the new version number
Then press G on keyboard to install new software
When BOOTLOADER> prompt returns, the new software is installed.
Disconnect cable
Restart Professional Puncher A1