


I/O Panel 83
4
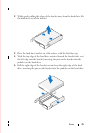
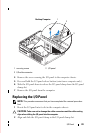
Remove the screw securing the I/O panel to the computer chassis.
5
Press and hold the I/O panel release button (mini tower computer only).
6
Slide the I/O panel down to release the I/O panel clamp from the I/O panel
clamp slot.
7
Remove the I/O panel from the computer.
Replacing the I/O Panel
NOTE: This procedure assumes that you have completed the removal procedure
first.
1
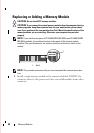
Reseat the I/O panel into its slot in the computer chassis.
CAUTION: Take care not to damage the cable connectors and the cable routing
clips when sliding the I/O panel into the computer.
2
Align and slide the I/O panel clamp in the I/O panel clamp slot.
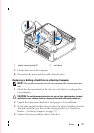
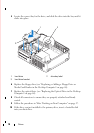
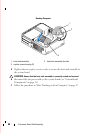
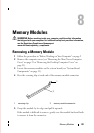
1 securing screw 2 I/O panel
3 I/O cable connector
3
1
2
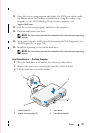
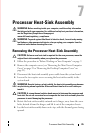
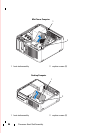
Desktop Computer