


76 Snapshot Virtual Disks
4
Follow any additional instructions for your operating system. Failure to
follow these additional instructions can create unusable snapshot virtual
disks.
NOTE: If your operating system requires additional instructions, you can find those
instructions in your operating system documentation.
After your host server has been prepared, see "Creating the Snapshot Using
the Advanced Path" on page 76 to create the snapshot using the advanced
path.
If you want to use a snapshot regularly, such as for backups, use the Disable
Snapshot and Re-create Snapshot options to reuse the snapshot. Disabling
and re-creating snapshots preserves the existing virtual disk-to-host mappings
to the snapshot virtual disk.
Creating the Snapshot Using the Advanced Path
NOTE: Removing the drive letter of the associated virtual disk in Windows or
unmounting the virtual drive in Linux will help to guarantee a stable copy of the
drive for the Snapshot.
After first preparing the host server(s) as specified in the preceding procedure,
complete the following steps to create a virtual disk snapshot using the
advanced path:
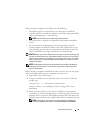
1
In MD Storage Manager, click the
Configure
tab, and then click
Create
Snapshot Virtual Disks
.
2
The
Additional Instructions
dialog appears; click
Close
in this dialog to
continue.
3
Click the plus sign (+) to the left of the disk group to expand it, then click
the virtual disk from which you want to create a snapshot.
4
Click
Next
.
A
No Capacity Exists
warning appears if there is not enough space in the
disk group of the source virtual disk to create the snapshot.
5
On the
Create Snapshot Virtual Disks – Select Path
screen, select the
Advanced path.
NOTE: A snapshot repository virtual disk requires 8 MB of free space. If the
required free space is not available in the disk group of the source virtual disk,
the Create Snapshot Virtual Disks feature defaults to the advanced path.