36 Emphasis Control System Quick Guide
Insert Fixtures
You can insert fixtures directly into the Spreadsheet using the Library.
Insert fixtures one at a time:
Step 1: In the Library menu, click Browse Library.
Step 2: Navigate to the fixture you want to insert.
Step 3: Double-click on the fixture name you want to insert. The fixture will be inserted at
the bottom of the list of fixtures in the Spreadsheet.
Change the properties of the fixture before inserting:
Step 1: In the Library menu, click Browse Library.
Step 2: Navigate to the fixture you want to insert.
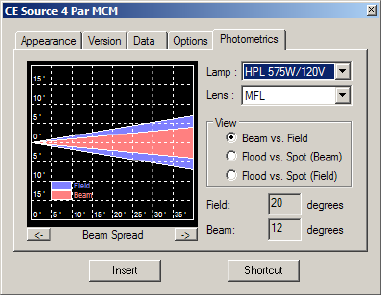
Step 3: Right-click on the fixture name and click Property. A dialog box will open with a
shaded view of the fixture on the left and an image of its symbol on the right.
Step 4: Use the tabs to modify various settings of the fixture.
Step 5: Click Insert.
Create a shortcut for this fixture:
Step 1: In the Library menu, click Browse Library.
Step 2: Navigate to the fixture you want to insert.
Step 3: Right-click the fixture name and click Create Shortcut.
Step 4: Right-click on the newly created Shortcut button and click Properties.
Step 5: Set the fixture properties as desired and click OK.
Insert multiples of a fixture:
Step 1: In the Library menu, click Browse Library.
Step 2: Navigate to the fixture you want to insert.
Step 3: Right click on the fixture name.
Step 4: Click on Insert Multiple.
Step 5: Enter the number of fixtures you want to insert and click OK.


