


58 Emphasis Visualization v1.4.0 User Manual
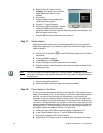
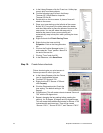
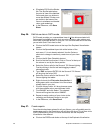
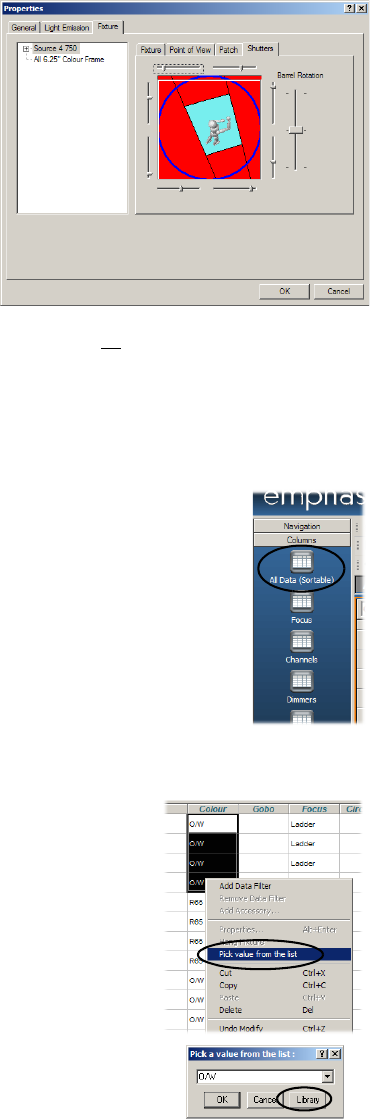
c. [Emphasis 3D] Click the Shutter
tab. The Shutter tab displays
the point of view of the selected
fixture and gives you sliders to
move the shutters. Shutter cuts
are visible in the beam of the
fixture in wireframe and shaded
views, and renderings.
d. In the File menu, click Save
Show.
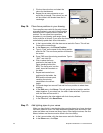
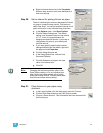
Step 26: Edit fixture data in DATA mode.
DATA mode provides you a spreadsheet view of all the data associated with
fixtures and controllable devices (such as colour scrollers, gobo rotators and
other DMX-controlled devices) in your plot. You can enter and edit all the data
you set with Quick Tools here as well.
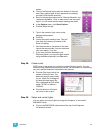
a. Click on the DATA mode button at the top of the Emphasis Visualization
screen.
b. Click on the Spreadsheet layout tab at the bottom of the
work area, if it is not already selected. Use the Columns
shortcuts to change to commonly used views of your show
data.
c. Click on the All Data (Sortable) shortcut.
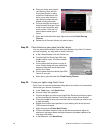
d. Scroll to find the Focus column. Click on “Focus” at the top of
the column to sort by the focus position.
e. Select the Colour cells for the Source 4 750 fixtures lighting
Fred by clicking in the first cell and dragging to select
subsequent cells.
f. Type “R65” and press ENTER. All the Source 4 750 fixtures
will be given the colour R65.
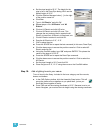
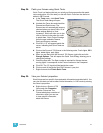
g. Select the Colour cells for the Source 4 750
fixtures lighting the ladder.
h. Right-click and click Pick value from the list. A
dialog opens with a scroll-down list of the colours
already used in your plot.
i. Click the Library button. A Library browser opens
with the available colour manufacturers listed.
j. Find GAM987 and click Select. The selected
fixtures will be given the colour GAM987.
k. Repeat to assign colours of your choice to the
remaining conventional fixtures in your plot.
l. In the File menu, click Save Show.
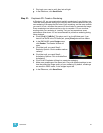
Step 27: Create reports.
Once the data has been entered for all your fixtures, you will probably want to
create paperwork for the Electricians who will hang the show. This is done in the
PRES (Presentation) mode. For more information, see the Emphasis
Visualization User Manual.
a. Click on the PRES mode button at the top of the Emphasis Visualization