


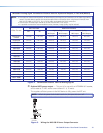

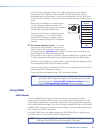
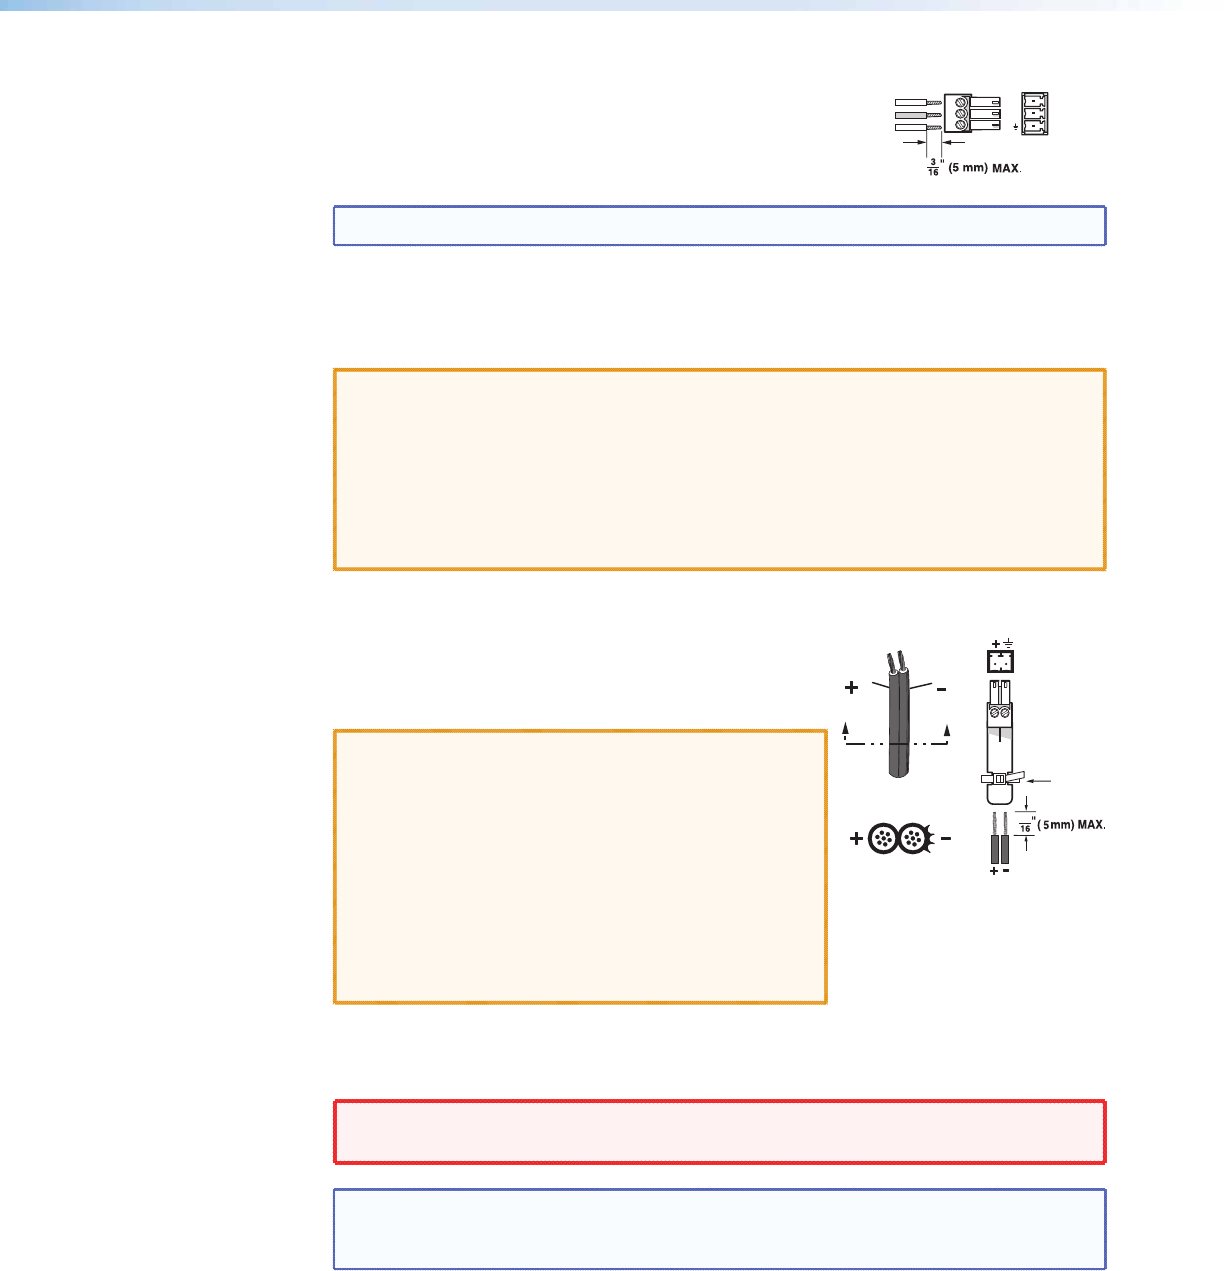
RS-232 control (digital side) — Connect a serial
communications port on a display device to the 3.5 mm,
3-pole captive screw connector (labeled RS-232 pass-thru)
for pass-through RS-232 bidirectional communication. Wire
the connector as shown at right.
NOTE: RS-232 control port on the analog side is not used in the MLS 608 D system.
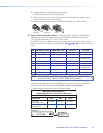
Power connection — Connect the 2-pole 3.5 millimeter captive screw connector
from the 12 VDC, 1.0 A external power supply (provided) to this receptacle on the rear
panel. Ensure the connections have the correct polarity.
CAUTION: Always use a power supply supplied or specied by Extron. Use of an
unauthorized power supply voids all regulatory compliance certification and
may cause damage to the supply and the end product. Unless otherwise
stated, the AC/DC adapters are not suitable for use in air handling spaces
or in wall cavities. The installation must always be in accordance with the
applicable provisions of National Electrical Code ANSI/NFPA 70, article 75
and the Canadian Electrical Code part 1, section 16. The power supply shall
not be permanently fixed to building structure or similar structure.
Alternatively, connect to the 2-pole power connector on the MLS 608 D
(see e
on page 10).
See the figure at right showing how to wire the
connector.
CAUTIONS: Power supply voltage polarity is critical.
Incorrect voltage polarity can damage
the power supply and the unit. The
ridges on the side of the cord identify
the power cord negative lead.
The length of the exposed (stripped)
copper wires is important. The ideal
length is 3/16 inch (5 mm). Longer
bared wires can short together. Shorter
wires are not as secure in the connectors
and could be pulled out.
To verify the polarity before connection, plug in the power supply with no load and check
the output with a voltmeter.
WARNING: The two power cord wires must be kept separate while the power supply
is plugged in. Remove power before wiring.
NOTE: Do not tin the power supply leads before installing them in the direct insertion
connector. Tinned wires are not as secure in the connectors and could be
pulled out.
When power is applied the front panel power LED lights.
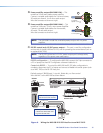
Power Supply
Output Cord
2-pole Captive
Screw
Connector
SECTION A–A
Ridges
Smooth
A
A
Tie Wrap
3
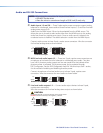
RS-232 Device Pins
MTP/HDMI
RS-232
Pass-thru
port
Rx
Ground
TxRx
Tx
MLS 608 D Series • Rear Panel Connections 18