About Actions (for Windows Users)
145
2. Change settings.
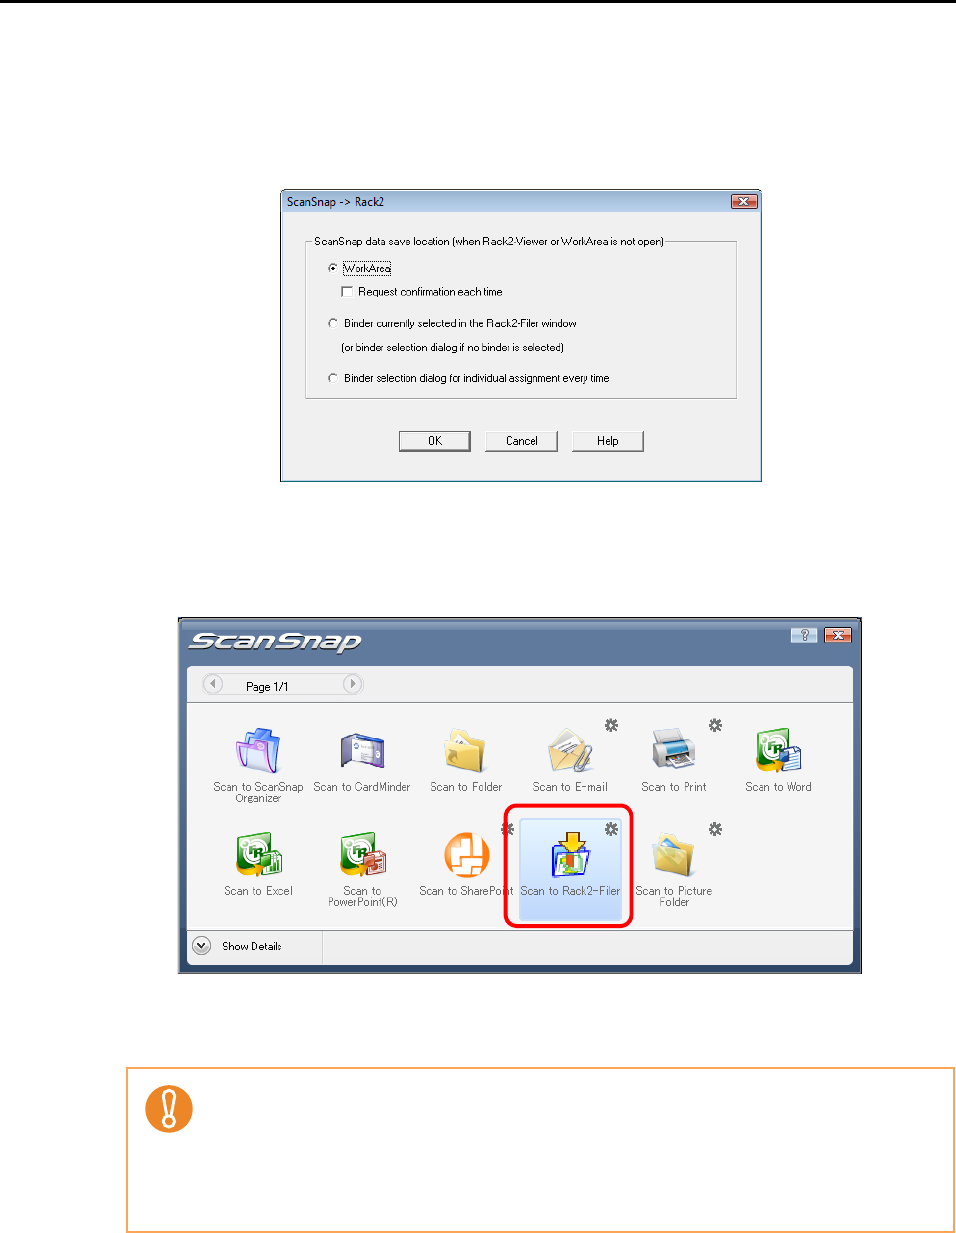
In this dialog box, specify the destination to save the scanned image data.
For details about the [ScanSnap -> Rack2] dialog box, refer to Rack2-Filer Help.
Click the [Help] button in the [ScanSnap -> Rack2] dialog box to display Rack2-Filer
Help.
3. Click the [OK] button to close the [ScanSnap -> Rack2] dialog box.
4. Click the [Scan to Rack2-Filer] icon.
⇒ Rack2-Filer starts up, and the PDF file created by the ScanSnap is saved to Rack2-
Filer according to the settings specified in Step 3..
• When [JPEG(*.jpg)] is selected for [File format] in the [File option] tab on the ScanSnap
setup dialog box, the [Scan to Rack2-Filer] icon is grayed out and cannot be selected.
• When the Quick Menu is displayed, scanning cannot be performed with the ScanSnap.
Complete the interaction with Rack2-Filer before scanning another document.
• Do not move, delete, or rename the scanned image data in other applications while the
Quick Menu is displayed.


