


Chapter 4 121
Field Replaceable Units
FRU Removal and Replacement
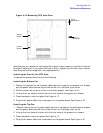
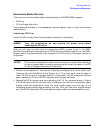
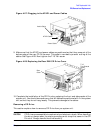
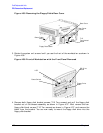
Figure 4-27. Plugging in the ATAPI and Power Cables
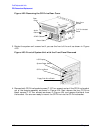
9. Make sure that the ATAPI and power cables are positioned so that they come out of the
bottom edge of the rear CD Drive cover. This edge is rounded to prevent cutting of the
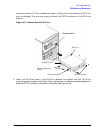
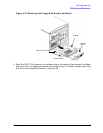
cables. See Figure 4-28. Next tighten the T-15 Torx screw.
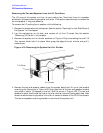
Figure 4-28. Replacing the Rear EMI CD Drive Cover
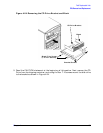
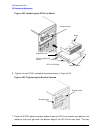
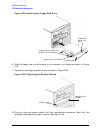
10. Complete the installation of the CD Drive by replacing the front and side panels of the
system unit. You should also make sure that all cables are positioned with in the system
unit so that they do not hang loosely. This prevents damage to the cables.
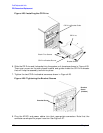
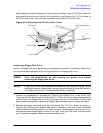
Removing a CD Drive
This section explains how to remove a CD Drive from you system unit.
CAUTION
CD Drives are susceptible to mechanical and electronic shock. When handling
the drive, always wear the static-grounding wrist strap that came in the CD
Drive kit. Always handle the drive carefully.
Audio Cable
ATAPI Cable
Power Cable
Rear
Cover
T-15
Torx/Slotted
Screw