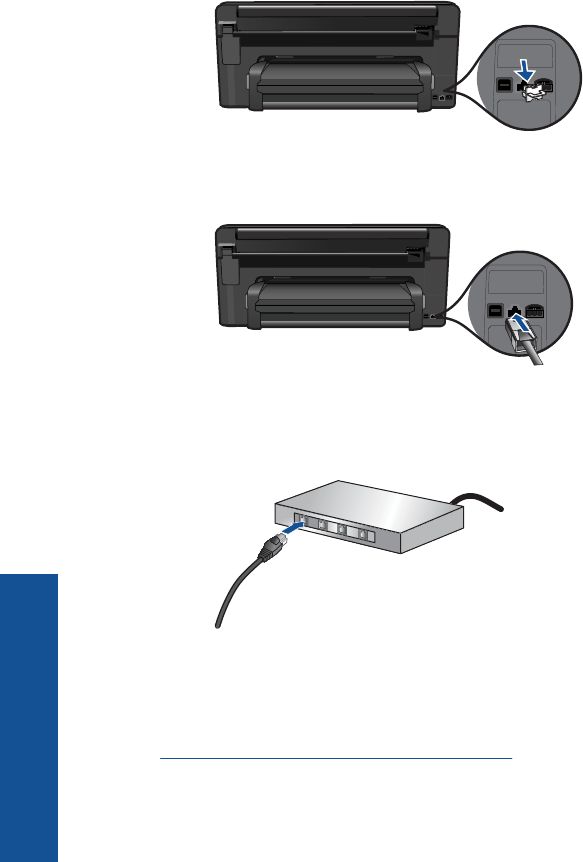
b. Connect the Ethernet cable to the Ethernet port on the back of the HP Photosmart.
c. Connect the other end of the Ethernet cable to an available port on your Ethernet
router or switch.
2. Install software.
3. View the animation for this topic.
Related topics
“
Install the software for a network connection” on page 66
WiFi Protected Setup (WPS)
To connect the HP Photosmart to a wireless network using WiFi Protected Setup (WPS),
you will need the following:
A wireless 802.11 network that includes a WPS-enabled wireless router or access
point.
A desktop computer or laptop with either wireless networking support, or a network
interface card (NIC). The computer must be connected to the wireless network that
you intend to install the HP Photosmart on.
Chapter 10
60 Network setup
Network setup


