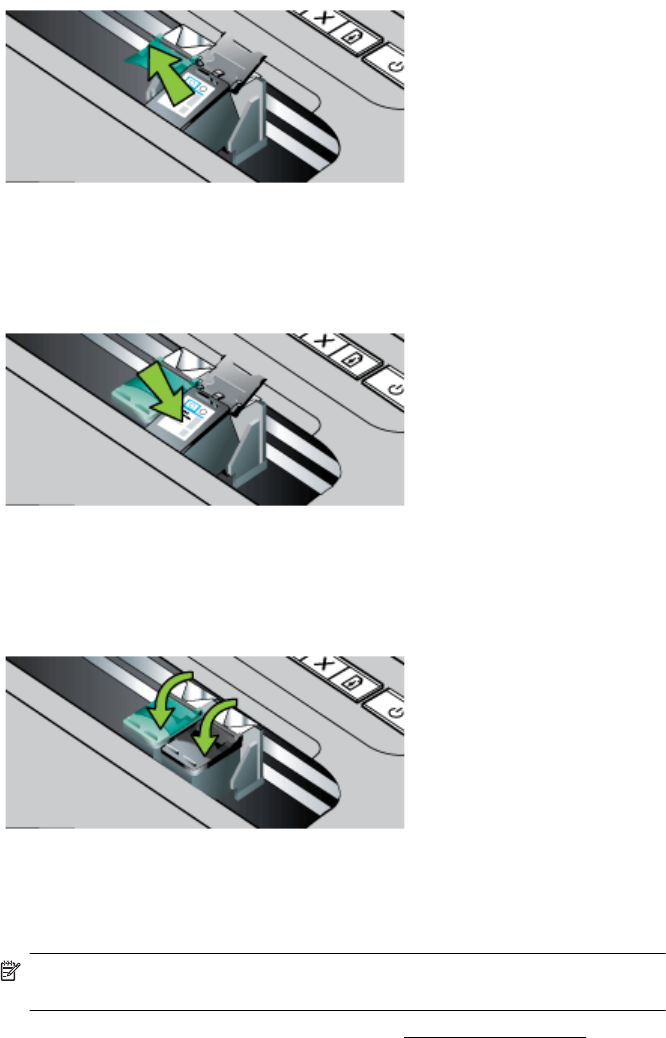
3. Lift the ink cartridge latch open and gently remove the ink cartridge from its cradle
compartment.
4. Insert the new ink cartridge into its cradle compartment at the same angle at which
you removed the old ink cartridge. Check the symbol on the latch against the
symbol on the ink cartridge to make sure you are inserting the correct ink cartridge.
5. Close the ink cartridge latch. If the cartridge is inserted correctly, closing the latch
gently pushes the cartridge into its cradle compartment. Press the latch to make
sure it is seated flat on the cartridge.
6. Close the front access cover.
7. Wait for the carriage to complete the ink cartridge initialization routine and return to
the home position at the left side of the printer before using the printer.
NOTE: Do not open the front access cover until the ink cartridge initialization
is complete.
8. Align the ink cartridges. For more information, see Align the ink cartridges.
Replace the ink cartridges 35


