


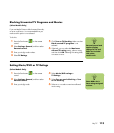


My TV 117
14 In the left box, click the plus sign (+) for Local
Disk (C:). The file tree expands. Click the plus
sign (+) for Documents and Settings, click the
plus sign (+) for All Users, and then click the
DRM box so a check mark appears.
15 Scroll down the list and click the System
State box so a check mark appears.
16 At the bottom of the window, beneath Backup
media or file name, click Browse. Because a
diskette is too small to save the backup file on,
you will need to save the file to the desktop
portion of the hard disk drive before writing
the file to CD. If the message Insert a disk into
drive A appears, click Cancel.
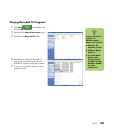
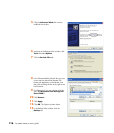
17 The Save as window opens. In the Save as
type box, select Desktop from the drop-down
list. In the Save as box, use the default name
(Backup.bkf) or type in a file name with the
extension .bkf and then click Save. The
window closes.
18 Click Start Backup in the Backup Utility
window. The Backup Job Information window
opens.
19 Click Start Backup. The Backup Progress
window opens. When the process finishes, the
window displays the message The backup is
complete.
20 Click Close.
21 Close the Backup Utility window. Continue
with the next procedure.
Make the Backup CD
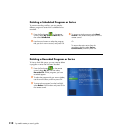
1 Click Start on the taskbar, choose All
Programs, CD (DVD) Recorder, if
present, RecordNow!, and then click
RecordNow! again. The RecordNow!
window opens.
2 Insert a blank CD.
3 Select the Data Projects tab, and then click
Data Disc.
4 Click Continue.
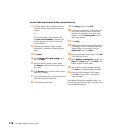
5 Click Add Files and Folders. The Select
files and folders to add window opens.
6 In the Look in box, select Desktop from the
drop-down list.
7 Click the backup file (for example Backup.bkf)
so it appears in the File name box. Click
Add. The window closes.
8 In the RecordNow! window, click the red
Burn icon. If a warning window opens,
click OK.
9 Wait while the program writes to the CD and
the disc tray ejects.
10 Remove the CD, label it, and store it in a
safe place for use with the next procedure.
Click Done.
11 Close the RecordNow! window.
12 Because you do not need the backup file you
created, drag the file to the Recycle Bin on the
desktop. This deletes the copy of the file that
was on the hard disk drive.