


158 hp media center pc user’s guide
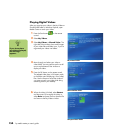
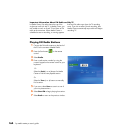
To record videos from a digital video camera
1 Connect your digital camera to the PC.
2 Click Start, choose All Programs,
Accessories, Entertainment, and then
click Windows Movie Maker.
3 Click File, and then click Capture from
video device. If you have already captured
your video file, click Import video and
select it from the My Videos folder. Follow any
onscreen instructions to complete capturing
your video file.
4 When the video displays inside the Record
window, use the digital video camera controls
to find the place in the video where you want
to begin recording, and then click the pause
button.
5 Click Record, and then click Play under
Digital video camera controls. The video is
recorded to the hard disk drive.
6 To end the recording, click Stop.
7 When the Save Windows Media window
appears, type a file name and then click
Save to save the video file to My Videos
folder.
The saved video is now ready to be used by other
video players or can be recorded to a CD or DVD.
Refer to Windows Movie Maker Help for more
information about capturing, editing, and recording
your video files.
Using Supported File Types for My Videos
You can view the following types of video files in
Media Center. Other file types are supported if your
PC has the correct audio and video cards installed.
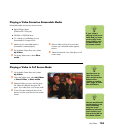
n
Refer to Creating
DVDs and CDs guide
that came with your
PC for more
information about
recording videos from
a digital camera.
File extension File type
.avi Video file
.mpeg, mpg,
.mpe, .mlv,
.mp2, .mpv2
Movie file
.wm, .asf Windows Media file
.wmv Windows Media A/V file