Solve fax problems
Fax troubleshooting checklist
●
Several possible fixes are available. After each recommended action, retry faxing to see if the
problem is resolved.
●
For best results during fax problem solving, make sure the line from the product is plugged
directly into the wall phone port. Disconnect all other devices that are connected to the product.
1. Verify that the telephone cord is plugged into the correct port on the back of the product.
2. Check the phone line by using the fax test:
a.
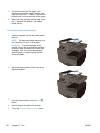
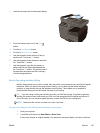
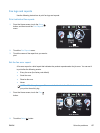
On the control panel, open the Setup
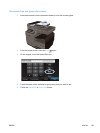
menu, and then open the Fax Setup menu.
b. Select the Fax Tools button.
c. Select the Run Fax Test option. The product prints a fax test report.
The report contains the following possible results:
●
Pass: The report contains all of the current fax settings for review.
●
Fail: The cord is in the wrong port. The report contains suggestions for how to resolve
the issue.
●
Fail : The phone line is not active. The report contains suggestions for how to resolve
the issue.
3. Verify that the product firmware is current:
a. Print a configuration page from the control panel Print Reports menu to obtain the current
firmware date code.
b. Go to
www.hp.com.
1. Click the Support & Drivers link.
2. Click the Download drivers and software (and firmware) link option.
3. In the For product box, type the product model number, and then click the Go button.
4. Click the link for your operating system.
5. Scroll to the Firmware section of the table.
◦
If the listed version matches the version on the configuration page, you have the
most current version.
◦
If the versions are different, download the firmware upgrade and update the
firmware on the product following the on-screen instructions.
NOTE: The product must be connected to a computer with internet access to
upgrade firmware.
◦
Resend the fax.
150 Chapter 12 Fax ENWW


