


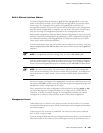
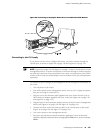
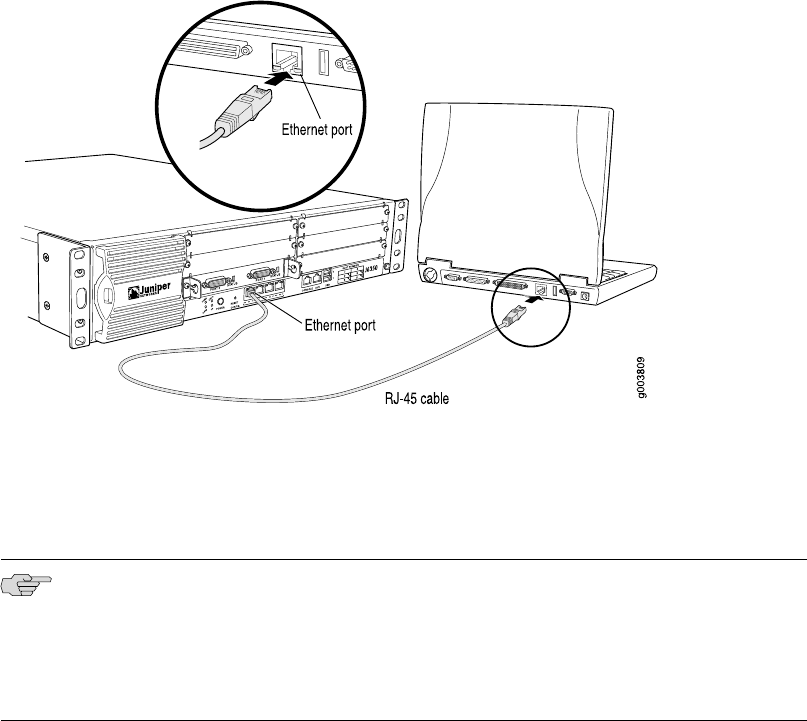
Figure 65: Connecting to the Gigabit Ethernet Port on J4350 and J6350 Routers
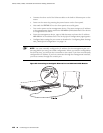
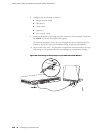
Connecting to the CLI Locally
If you plan to use the CLI to configure the router, you must connect through the
console port, as shown in Figure 66 on page 138 and Figure 67 on page 139.
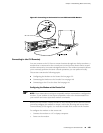
NOTE: Figure 66 on page 138 and Figure 67 on page 139 show a connection to a local
management device. A remote connection to the router through a modem requires
the cable and connector shown (provided in the router’s accessory box), plus a DB-9
female to DB-25 male (or similar) adapter for your modem, which you must purchase
separately.
To connect to the CLI using a local management device through the console port on
the router:
1. Turn off power to the router.
2. Turn off the power to the management device, such as a PC or laptop computer,
that you are using to access the CLI.
3. Plug one end of the Ethernet cable supplied with your router into the RJ-45 to
DB-9 serial port adapter supplied with your router (see Figure 66 on page 138
and Figure 67 on page 139).
4. Plug the RJ-45 to DB-9 serial port adapter into the serial port on the management
device (see Figure 66 on page 138 and Figure 67 on page 139).
5. Connect the other end of the Ethernet cable to the console port on the router
(Figure 66 on page 138 and Figure 67 on page 139).
6. Turn on the power to the management device.
7. Start your asynchronous terminal emulation application (such as Microsoft
Windows Hyperterminal) and select the appropriate COM port to use (for example,
COM1).
Connecting to a Services Router ■ 137
Chapter 7: Establishing Basic Connectivity