


Setting Options
Base name; by default, scanned files are
named "scan1", "scan2", and so on.
Location (folder) where the scanned files
will be saved
NOTE: Before you save a scanned file in Home Centre Software, you can preview, crop and sharpen the image,
and adjust the colour. On a computer with WINDOWS OS, see the Home Centre Software Help (? icon) for
instructions.
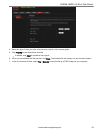
4. When you have finished making selections, click OK on the bottom right of the Printer Scan Settings window.
5. Close the Printer Tools window.
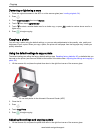
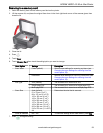
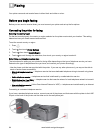
Loading originals for scanning
You can scan multiple-page documents automatically by loading the originals (up to 35 pages) face up in the
Automatic Document Feeder (ADF).
:
The ADF accepts plain paper originals from 6.9 to 8.5" (175 to 216 mm) wide and 9.8 to 11.7" (249 to 297 mm)
long.
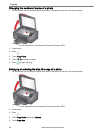
To scan a photo, documents on thick or thin paper or a document that is too small or too large to fit in the ADF, place
the original face down on the scanner glass.
For more information on loading originals, see Loading originals, 34.
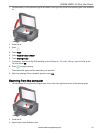
Scanning from the control panel
When you scan a document or picture(s) from the control panel, you have the following options:
Scan to Computer - scans to a file or to Home Centre Software on your computer
Scan to Memory Card - scans to a memory card in the memory card slot
Scan to E-mail* - scans to an e-mail address that you select from the E-mail Profile you set up in the Online
Printer Management Tool
Scan to Network Folder* - scans to a shared network folder that you designated in the Online Printer
Management Tool
* Before you can use these options, you must set up Scan to E-mail (see Setting up Scan To E-mail, 20) and Scan
to Network Folder (see Setting up Scan To Network Folder, 24) from the Online Printer Management Tool.
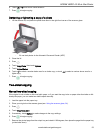
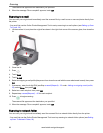
Scanning to a computer
1. Lift the scanner lid, and place the original face down in the right-front corner of the scanner glass, then close the
lid.
KODAK HERO 4.2 All-in-One Printer
www.kodak.com/go/aiosupport 57