


17: Maintenance and Diagnostics Settings
xSenso User Guide 101
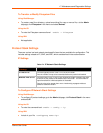
To Configure the Clock
Using Web Manager
To view configure clock information, go to the Admin tab/page and click Clock in the menu.
Using the CLI
To enter the command level: enable -> config -> clock
Using the XML
Include in your file: <configgroup name=”clock”>
System Settings
The xSenso System settings allow for rebooting the device, restoring factory defaults, uploading
new firmware and updating a system’s short and long name.
Note: Anytime you reboot the unit, this operation will take some time to complete.
Please wait a minimum of 10-20 seconds after rebooting the unit before attempting to
make any subsequent connections.
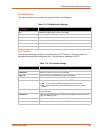
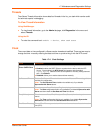
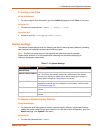
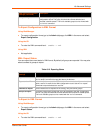
Table 17-12 System Settings
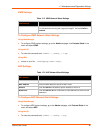
To Reboot or Restore Factory Defaults
Using Web Manager
To access the area with options to reboot, restore to factory defaults, upload new firmware,
update the system name (long or short names) or to view the current configuration, go to the
Admin tab/page, click System in the menu.
Using the CLI
To enter the command level: enable
System Settings Description
Reboot Device
Reboots the device.
Restore Factory Defaults
Restores the device to the original factory settings. All configuration will be
lost. The xSenso automatically reboots upon setting back to the defaults.
You may also reboot your xSenso with or without restoring the settings to
factory default through the Reset Button on the device.
Upload New Firmware
Write the new firmware file to firmware.rom on the xSenso. The device
automatically reboots upon the installation of new firmware. See the section,
FTP Settings on page 78.
Short Name Enter a short name for the system name. A maximum of 32 characters are
allowed.
Long Name Enter a long name for the system name. A maximum of 64 characters are
allowed.