


30
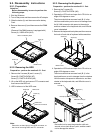
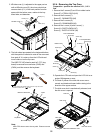
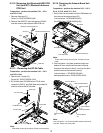
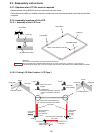
9.2.10. Removing the Drive Unit
Preparation : perform the section 9.2.1., 9.2.3.
and 9.2.4. first.
1. Peel off the tape from the connector.
2. DVD FFC is removed from connector (CN501), and
the drive unit is lifted from the bottom case, and the
gasket is peeled off and then remove the drive unit.
DRIVE-MAIN FFC
Drive Unit
Gadket
Tape
CN501
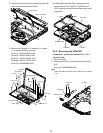
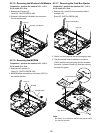
Note:
-When you exchange DRIVE-MAIN FFC,
mark the bottom case, and match new FFC to
marking of the bottom case, bend, and build the
bend externals of FFC before peeling off FFC from
the bottom case.
-Tape and gusket cannot be recycled. Please use
new parts.
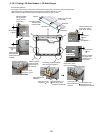
2. Peel off the 6 tapes, main PWB sheet and line hold
sheet 3.
Main PWB sheet : DFMX1228ZA (K64)
Line hold sheet 3 : DFHR3D59YA (K47)
Screw (T)
Screw (U)
Main PWB Sheet
Screw (S)
Tape
Tape
Tape
Line Hold Sheet 3
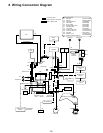
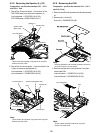
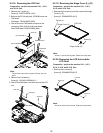
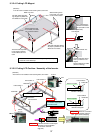
9.2.11. Removing the Main Board
Preparation : perform the section 9.2.1., 9.2.3.
and 9.2.4. first.
1.
Remove the 2 screws (S), 2 screws (T) and 1 screw (U).
Screw (S) : K1YE5000022 (N15)
Screw (T) : DFHE5035ZB (N1)
Screw (U) : DXQT2+E6FNL (N10)
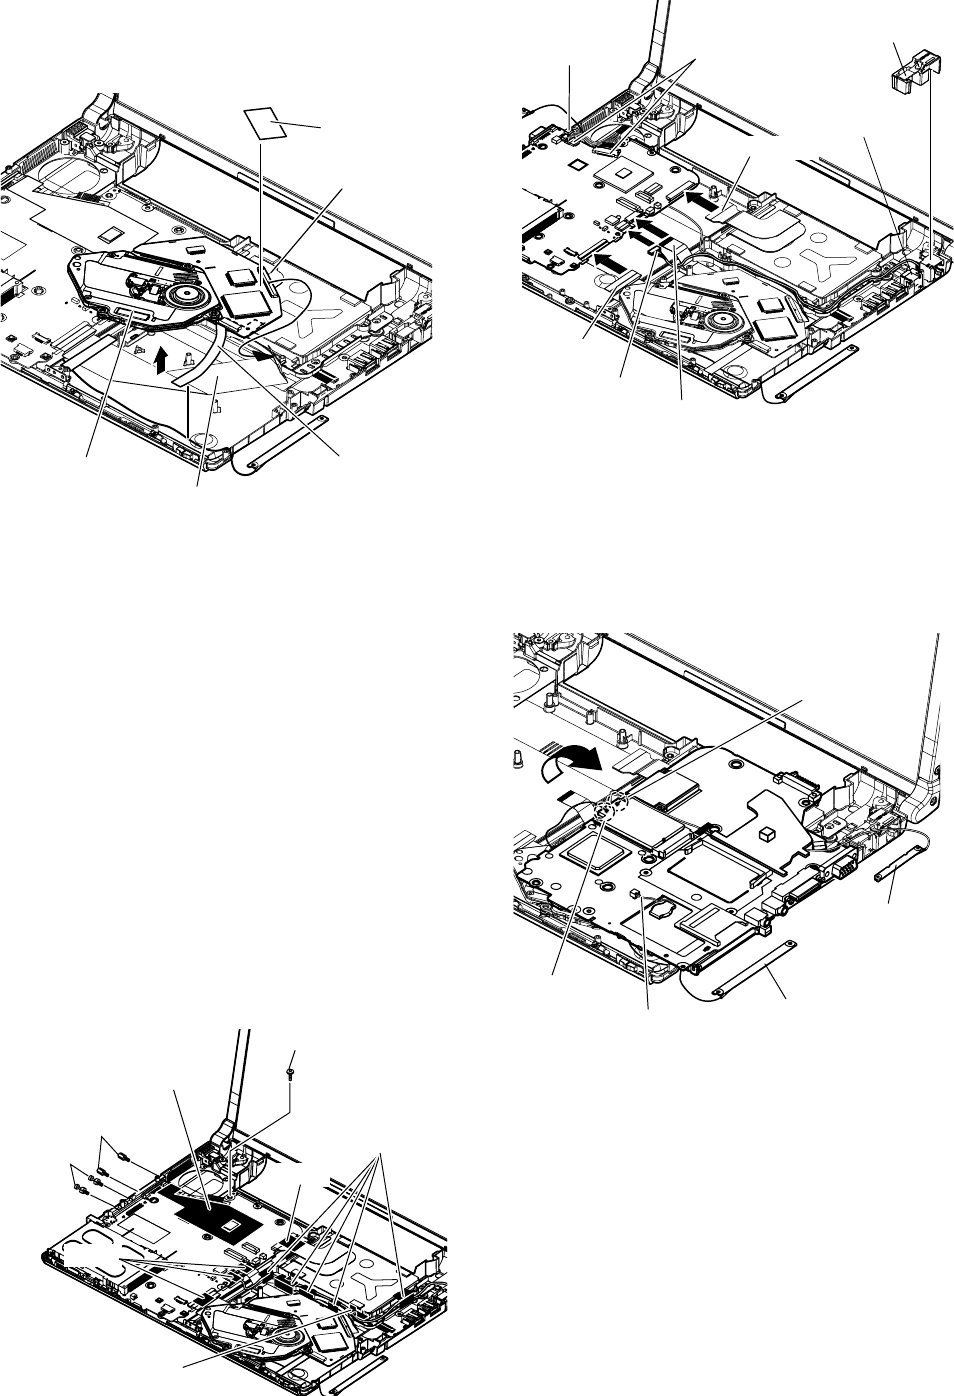
3. Disconnect the LCD connector (CN9) (CN10), DC-IN
connector (CN601) and FFC (CN4) (CN6) (CN18)
(CN8).
MODEM LAN
Holder
MODEM
Cable
LCD Cable
DC-IN
Cable
HDD FFC
USB FPC
LAN Cable
FFC Drive
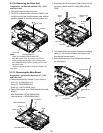
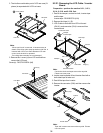
4. Turn inside out the main board. Remove the antenna
cable (L ), (R) from the wireless LAN module, and
then remove the main board.
5. Remove the connector from CN3 and then remove
the coin battery.
Coin Battery
Antenna Cable
(L)
Antenna Board
(L)
Antenna Board
(R)
Antenna Cable
(R)