


33
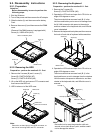
9.2.19. Removing the Hinge Cover (L), (R)
Preparation : perform the section 9.2.1., 9.2.3.,
9.2.4. and 9.2.18. first.
1. Remove the 2 screws (c) and then remove the hinge
Cover (L), (R).
Screw (c) : DRHM0076ZA (N17)
Note:
Screw (c) cannot be recycled. Please use new parts.
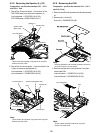
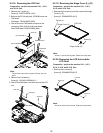
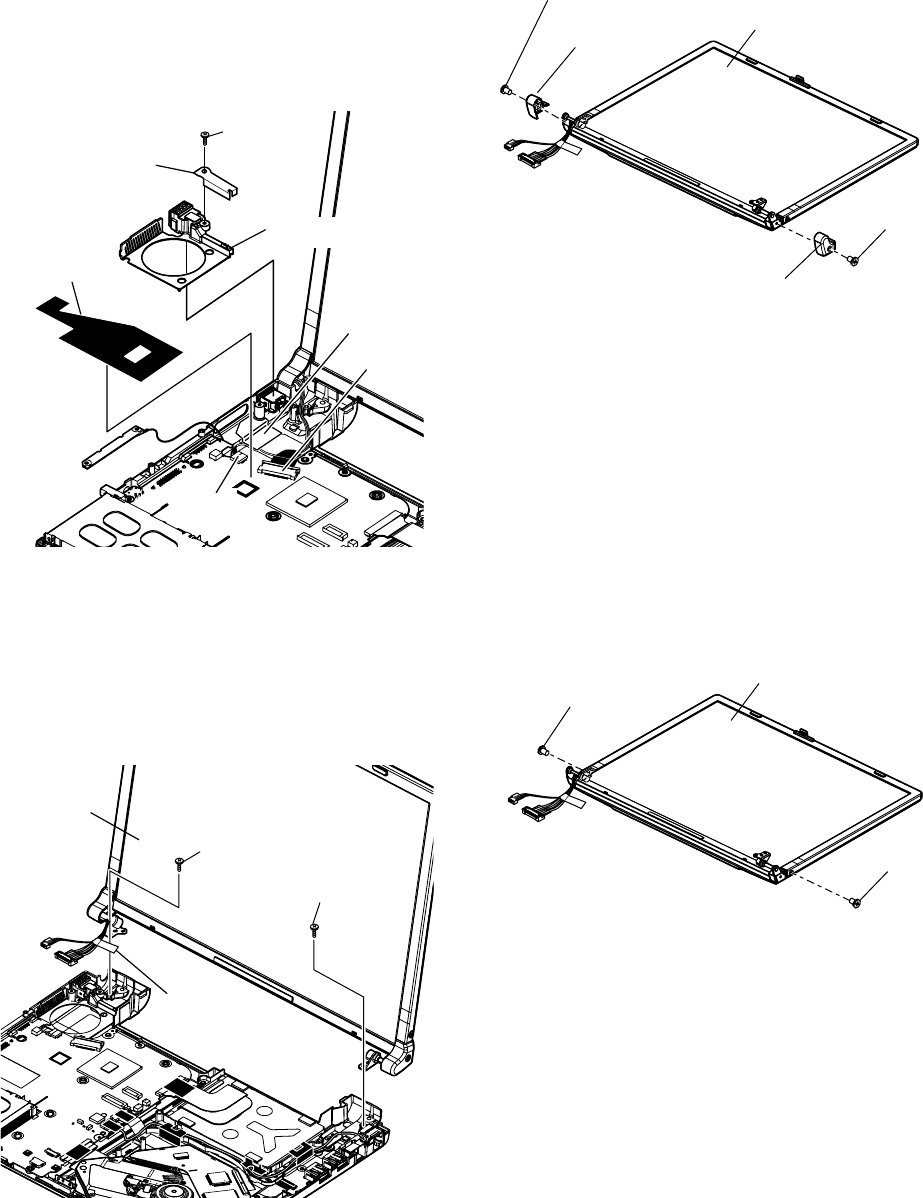
9.2.20. Removing the LCD Unit and the
LCD Rear
Preparation : perform the section 9.2.1., 9.2.3.,
9.2.4., 9.2.18. and 9.2.19. first.
1. Remove the 2 screws (d).
Screw (d) : DRHM0076ZA (N17)
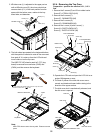
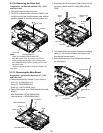
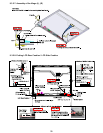
9.2.18. Removing the LCD Unit
Preparation : perform the section 9.2.1., 9.2.3.
and 9.2.4. first.
1. Remove the 1 screw (a).
Screw (a) : DXQT2+E6FNL (N10)
2. Remove the DC-IN jack plate, DC MDM cover and
FAN sheet.
FAN sheet : DFMY0428ZA (K65)
3. Peel off the main PWB sheet and remove the
connector (CN9), (CN10) of the main board.
Main PWB sheet : DFMX1228ZA (K64)
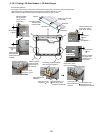
Screw (a)
DC Jack Plate
DC MDM Cover
Main PWB Sheet
CN10
CN9
FAN Sheet
Note:
These sheet cannot be recycled. Please use new
parts.
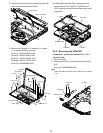
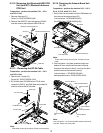
4. Remove the 2 screws (b).
Screw (b) : DXYN26+J6FNM (N11)
5. Peel off the EMI sheet 3 and then remove the LCD
unit.
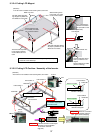
Screw (b)
Screw (b)
LCD Unit
EMI Sheet 3
Note:
Screw (d) cannot be recycled. Please use new parts.
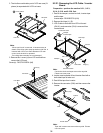
Screw (c)
Hinge Cover (R)
Hinge Cover (L)
Screw (c)
LCD Unit
Screw (d)
Screw (d)
LCD Unit