


108
Event terminal
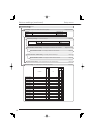
You can set the functions allocated to the EVENT terminals (1
to 3) on the rear panel.
Step
1 Allocate a function to Event 1 to 3.
•
[Event 1] corresponds to the EVENT 1 terminal,
[Event 2] to the EVENT 2 terminal, and [Event 3] to
the EVENT 3 terminal.
[REC (edge)]: When the EVENT terminal is
grounded, recording starts.
[REC (level)]: Recording is performed while the
EVENT terminal is being grounded.
[Rec stop]: When the EVENT terminal is grounded,
recording stops.
[Program 1 to 3]: When the EVENT terminal is
grounded, the program registered to Program 1 to
3 is started. When no program is registered, you
cannot select this item.
[ADC]: When the EVENT terminal is grounded, the
recorder cancels the alarm display function and
displays the screen that was displayed before the
alarm display.
[Off]: The recorder does not operate even when the
EVENT terminal is grounded.
Step
2 To check the program fi les, select [Next] next to
[View the program fi les].
•
The registered programs are displayed.
Step
3 To read the program fi les, select [Execute] next
to [Read program fi les].
•
You can read and overwrite the program data copied
to a USB memory device.
•
You cannot modify 3 programs individually.
Step
4 To delete the program fi les, select [Execute] next
to [Clear program fi les].
•
All the registered program files are deleted. The
events set in [Program 1 to 3] are set to [Off].
Tips
• When you execute [Forced stop of program] on the
<Warning display • Ext terminal setting> screen, the
ongoing programs are all terminated forcedly. Forced
termination can be executed while the programs are
running.
• The character string specifi ed by the program appears
on the screen while the program is running.
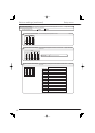
On-screen display settings
<Information display setting>
Clock display mode and location
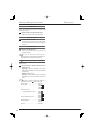
You can set the display mode and position of the clock.
Step
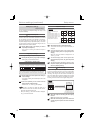
1 Select the clock display mode.
[Mode 1]:
01-01-2008 Tue 00:00:00
[Mode 2]:
01-01-2008 Tue
00:00:00
[Mode 3]: The clock is not displayed.
Step
2 Select the clock display position.
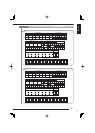
Recorder status and title display
You can select the recorder's operation status to be
displayed.
Step
1 Select the modes you want to display on the
screen.
[Remain 1]: The remaining capacity of the device
selected in [Remain 1] of [Mode-out • Remaining
capacity] is displayed.
[Remain 2]: The remaining capacity of the device
selected in [Remain 2] of [Mode-out • Remaining
capacity] is displayed.
[Status]: The recorder's operation status (playback,
normal recording, alarm recording, emergency
recording, etc.) is displayed.
[Active HDD]: Device being recorded or played
back is displayed.
[Recorder title]: The recorder title you set is
displayed.
•
The modes you check the boxes are displayed on
the screen.
•
The display positions of the selected modes are
automatically determined depending on the clock
display position.
Tips
• You cannot display [Remain 1] and [Remain 2] when
[HDD] is set to [Off] on the <Mode-out • Remaining
capacity> screen (
page 107).
Various settings (continued)
Setup menu