


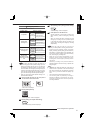

45
Viewing images
ENGLISH
You can control the connected cameras using the PTZ
function.
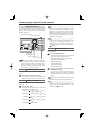
Controlling the cameras using the menus
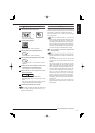
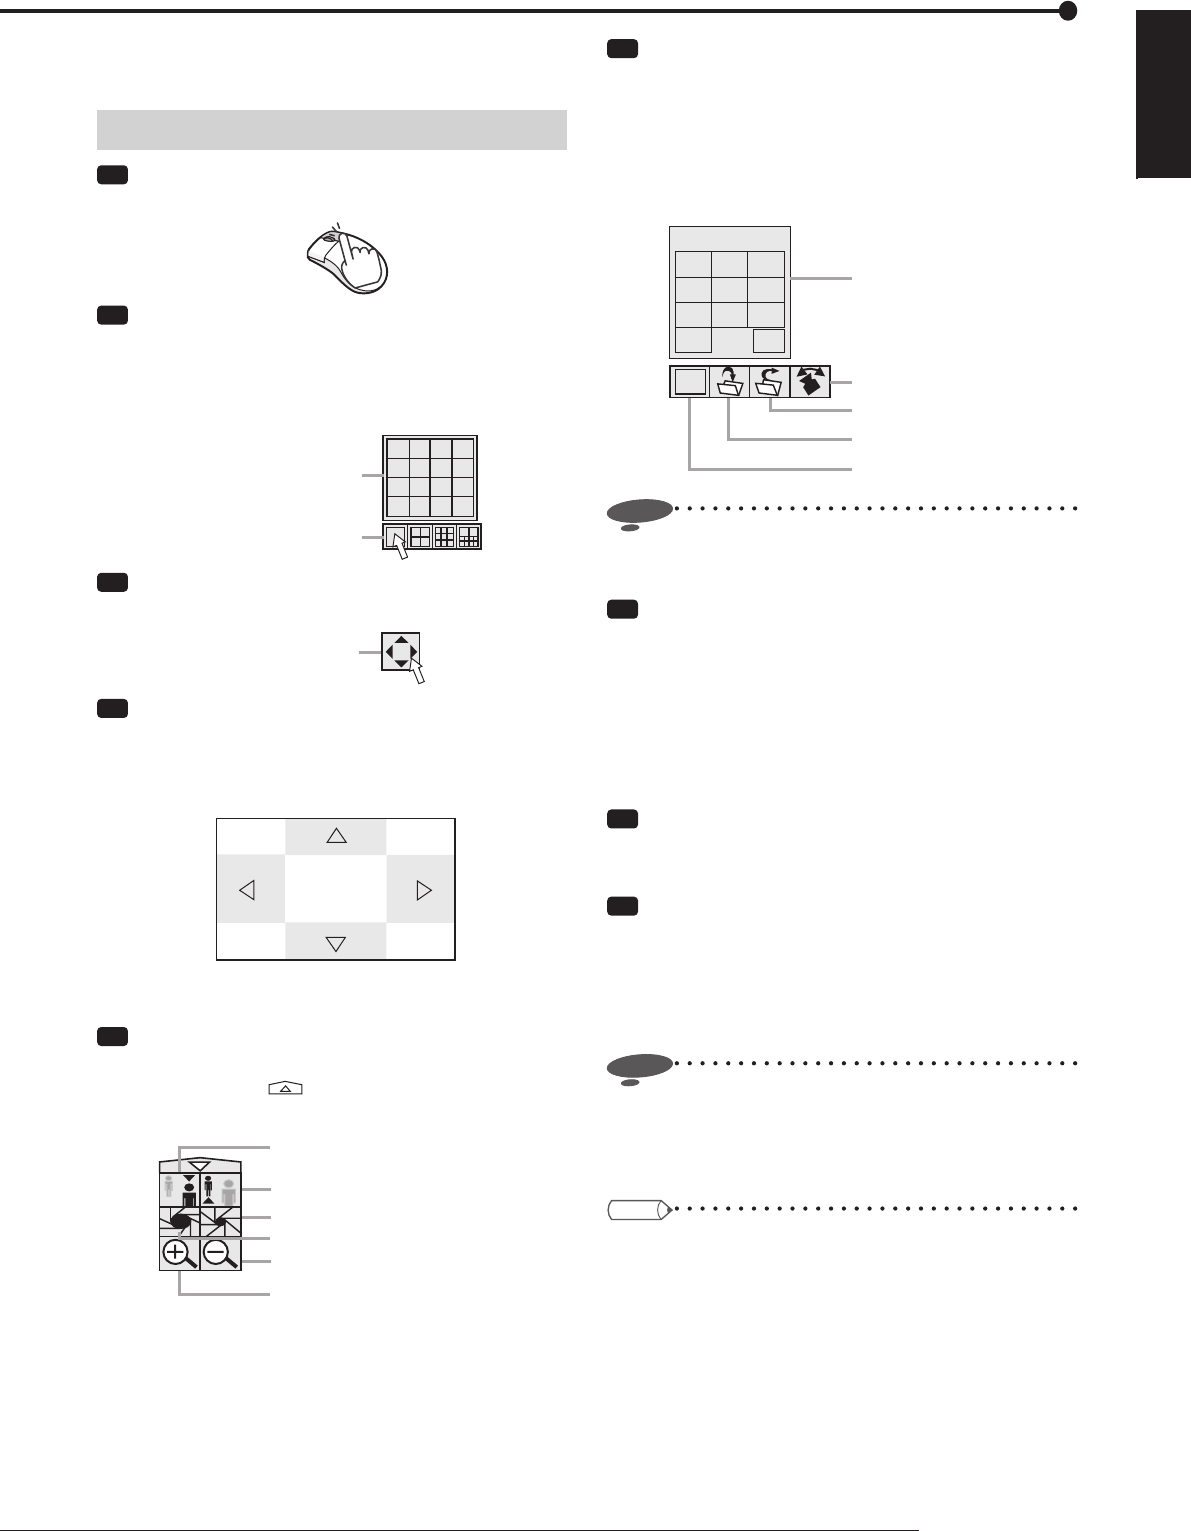
Step
1 Right-click the mouse.
•
The mouse operation screen is displayed.
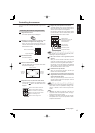
Step
2 Display the image from the camera to be
controlled in the single screen display mode.
•
When you press the Single screen button, the
Camera number buttons are displayed. Click the
desired camera number.
1234
5678
9101112
13 14 15 16
Single screen button
Camera number buttons
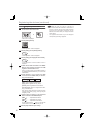
Step
3 Click the PTZ button.
•
The PTZ mode starts.
PTZ button
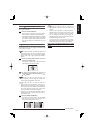
Step
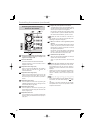
4
-1
Pan or tilt the PTZ camera.
•
Click the shaded areas on the screen shown below
to adjust the camera angle.
Camera is tilted up.
Camera is
panned to
the right.
Camera is
panned to
the left.
Camera is tilted down.
Step
4
-2
Adjust the zoom, iris, and focus of the camera.
•
Click the following buttons for adjustment. When
you click the
button, the hidden buttons are
displayed.
Button for wide angle zoom.
Button for narrow angle zoom.
Button to close the iris of the camera.
Button to set the camera focus far.
Button to set the camera focus near.
Button to open the iris of the camera.
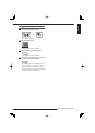
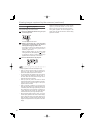
Step
4
-3
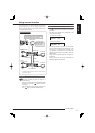
Register the preset positions of the camera.
•
To register viewing points, click the Preset memory
button and then click the Number buttons within 5
seconds. Up to 48 points can be registered.
For example, to register the current camera position
to preset number 2, click the Preset memory button
and then Number buttons 0 and 2 in order.
Auto pan button
Preset recall button
Preset memory button
Single screen button
Number buttons
(Displayed when you click the
Preset memory button or
Preset recall button.)
Register
123
456
789
0
X
Notice
• The recorder may not be able to register 48 points
depending on the system confi gured.
Step
4
-4
Move the camera to the registered preset
position.
•
When you click the Preset recall button and then
press the number buttons within 5 seconds, the
camera is moved to the registered preset position.
For example, to move the camera to the registered
preset position 2, click the Preset recall button and
then the Number buttons 0 and 2 in order.
Step
4
-5
Activate the auto pan function.
•
When you click the Auto pan button, the auto pan
function of the camera is activated.
Step
5 To change the controlled camera, display the
image from the camera you want to control in the
single screen display mode.
•
When you press the Single screen button, the
Camera number buttons are displayed. Click the
desired camera number.
Notice
• Operation of the camera may become impossible for
some reason such as a specification change of the
camera. In addition, some functions may become
invalid.
Tips
• To go back to the mouse operation screen, click [X] in
the upper right corner of the screen.
• Operations or functions performed with this recorder
are simplifi ed ones. They are not equivalent to those
of special control devices.
Controlling the cameras