


55
Recording
ENGLISH
Making recording settings manually
<Manual setting>
You can make recording settings manually.
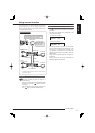
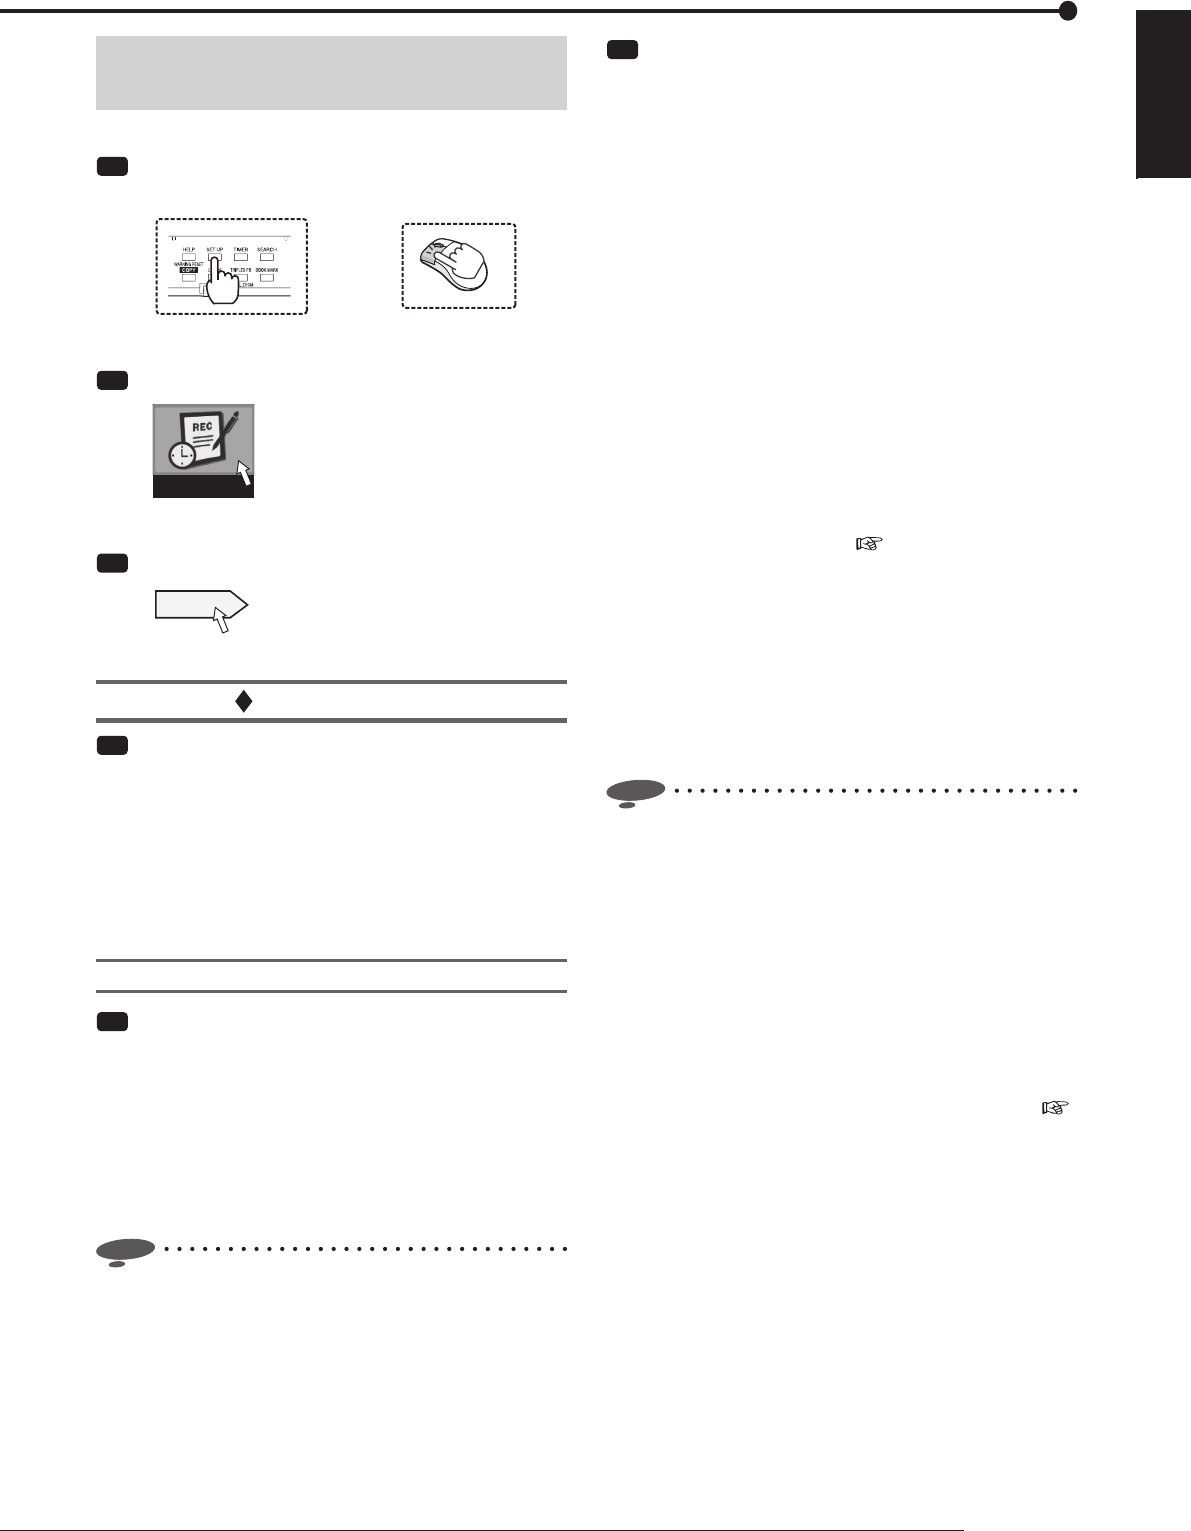
Step
1 Press the SET UP button on the front panel of
the recorder or left-click the mouse.
or
•
<Main menu> is displayed.
Step
2 Select [Recording setting].
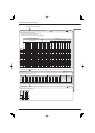
Recording setting
•
The <Recording setting> screen is displayed.
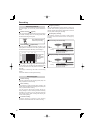
Step
3 Select [Setting] next to [Manual setting].
Setting
•
The <Recording settings> screen is displayed.
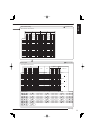
Recording A to D
Step
4 Select the recording pattern you want to set from
among [Recording A] to [Recording D].
[Recording A]: Used for manual recording and timer
recording.
[Recording B] to [Recording D]: Used for timer
recording.
•
Select [Setting] of the recording pattern you want to
set.
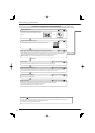
Picture size
Step
5 Select the picture size and select [Execute].
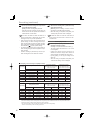
[4CIF]: 704x576. The maximum FPS rate is 100.
[2CIF]: 704x288. The maximum FPS rate is 200.
[CIF]: 352x288. The maximum FPS rate is 400.
•
When you select [Long recording mode], the
recording duration is prolonged with FPS set to 3 or
less. However, the recording and playback picture
quality decreases.
Notice
• When you change the picture size, the picture quality
and FPS are initialized.
Step
6 Select motion detection recording.
Select whether to use the motion detection as a
trigger of normal recording or that of alarm recording.
When recording scenes where there is constant
motion, you can save the HDD storage capacity
by selecting normal recording. In such a case, the
recorded data are stored separately from those
of ordinary alarm recording, resulting in increased
effi ciency in the alarm list search.
[REC in alarm recording mode by MD]: Alarm
recording starts when motion is detected.
[REC in normal recording mode by MD]: Normal
recording starts when motion is detected. Images
are recorded at the picture quality and FPS for
normal recording. This recording is not registered to
the alarm list.
When partition is set, images are recorded to the
normal recording area.
Set the trigger for starting alarm recording to other
than [EXT] in step 11 on
page 58.
In the case of Recording A, when motion detection
recording is not being performed, you can start
normal recording by pressing the REC/STOP button.
In the timer operation mode, when [MD] on the Timer
program screen is [ON], the recorder is in the motion
detection stand-by mode and performs normal
recording only with the cameras that detect motion.
(See the tables on the next page.)
Notice
• In normal recording by motion detection, the settings
made on the <Alarm camera setting> screen are
ignored and only the cameras that detect motion are
used. In alarm recording triggered by grounding of the
rear terminals, the cameras selected on the <Alarm
camera setting> screen are used.
• When the trigger for starting alarm recording is set
to [EXT&MD], normal recording by motion detection
is performed only while the rear terminals are being
grounded.
•
When motion detection recording is set to normal
recording, set [MD] for timer recording to [ON] (
page 67).