


81
Copy
ENGLISH
[Camera and audio fi lter]: Select the cameras and
audio you want to copy. When there are no images
or audio that were recorded from the selected
cameras or recorded during the designated period
of time, the recorder does not copy anything. Check
that there is an image that was recorded from the
selected cameras at the designated copy start time.
Select at least one camera when you copy audio.
[Copied data]: Select data to be copied, from
[Alarm] and [All]. When you want to copy only alarm-
recorded data, select [Alarm].
[Auto eject]: Upon completion of copying to a DVD/
CD disc, the disc tray is automatically opened. You
can select this option only when the copy destination
device is [DVD/CD].
Notice
• Only the areas created by the partition setting (
page 41) are displayed under [Copy from].
• When you execute copy with [Copied data] set to
[Alarm], unless there are alarm-recorded data within
the copy range, the recorder does not copy data
actually though the copy process appears to be in
progress. In the case of copying to a CD/DVD disc,
the remaining capacity of the disc decreases because
the management information is recorded. You are
recommended to perform [Test] when you are not sure
about the existence of alarm-recorded data.
Copying data by specifying the start
time and data size
Step
1 Set the copy conditions according to steps 1 to 4
of "Setting the copy conditions" on
pages 80
and 81.
•
Select [Set the start point and capacity] in step 3 and
specify the conditions.
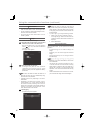
Step
2 After making settings, select [Next] on the
screen.
D:Next
•
The screen for setting the copy range is displayed.
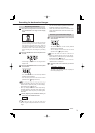
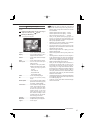
Step
3 Designate the copy start time and data size and
select [Next].
D:Next
•
Designate the start time by entering the date and
time or using bookmarks. When the copy source
device is set to [HDD (Archive)], you cannot
designate the time using bookmarks.
•
You can select the unit of data size from MB and GB.
The available range of data size is from 2 MB to 100
GB. When you select [Media Full], data are copied
until the free space on the disc runs out. (For copy to
DVD/CD only).
•
To copy data starting from the oldest recorded data,
click [Execute] next to [Read start time].
Step
4 Check the copy conditions and copy range on
the <Check the settings> screen.
•
When you select [Test], the recorder calculates the
copy end time.
Step
5 Select [Execute copy].
D:Execute copy
•
The recorder starts copying.
•
To stop copying manually, select [Cancel] on the
copy process screen. The data copied before you
stop remain in the copy destination device.
•
When you specify the capacity and the copy
destination DVD/CD disc becomes full during
copying, you can continue copying by replacing
discs. When the copy destination USB memory
device becomes full during copying, the recorder
stops copying.
Copying data by specifying the end time
and data size
Step
1 Set the copy conditions according to steps 1 to 4
of "Setting the copy conditions" on
pages 80
and 81.
•
Select [Set the end point and capacity] in step 3 and
specify the conditions.
Step
2 After making settings, select [Next] on the
screen.
D:Next
•
The screen for setting the copy range is displayed.
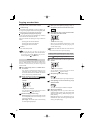
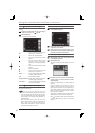
Step
3 Designate the copy end time and data size and
select [Next].
D:Next
•
Designate the end time by entering the date and time
or using bookmarks. When the copy source device
is set to [HDD (Archive)], you cannot designate the
time using bookmarks.
•
When the copy destination is HDD, designate the
data size in GB.
When the copy destination is DVD/CD or USB
memory, the data until the designated end point are
copied according to the remaining capacity of the
copy destination device.
•
To copy data to the latest recorded image, click
[Execute] next to [Read end time].
Step
4 Check the copy conditions and copy range on
the <Check the settings> screen.
•
When you select [Test], the recorder calculates the
copy start time. Unless you execute the test, the
recorder does not start copying.