


114
Settings related to communication
<Communication setting>
RS-232C setting
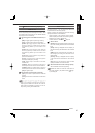
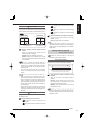
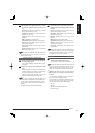
You can remotely control the recorder using a PC connected
to the RS-232C terminal of the recorder.
PC
Recorder
Connection via
RS-232C
Step
1 Select the communication mode.
[Remote A]: The recorder is controlled by a PC and
returns all types of operation status notifi cation.
[Remote B]: The recorder is controlled by a PC and
returns only responses to the command codes.
[Remote C]: The recorder is controlled by a PC and
does not return any notifi cation.
[Off]: The recorder is not controlled by a PC.
Step
2 Set the following items.
•
Transmission rate
•
Data bit length
•
Parity bit
•
Stop bit length
•
CR/CR•LF (Carriage return and line feed)
Notice
• Set these items same as those of the PC to be
connected.
• The command code table is contained in the CD
supplied with the recorder.
RS-485 cascade setting
You can make settings for the cascade function used via the
keyboard connected to RS-485 terminal on this recorder.
Step
1 Set the recorder address.
[Off]: The cascade function is not used.
[ID:01] to [ID:16]: When the cascade function is
used, set the ID number of the recorder.
Notice
• Set the recorder address uniquely.
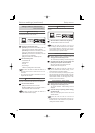
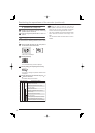
LAN setting
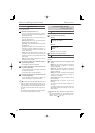
The recorder can communicate with a PC connected to its
LAN port.
Connection via
LAN port
Recorder
PC
Step
1 Set the IP address, subnet mask, and gateway.
•
The MAC address is shown on the screen.
Notice
• Do not assign "000.000.000.000" to the IP address
and broadcast address. Otherwise, not only the
communication functions but also the other functions
of the recorder may not operate correctly.
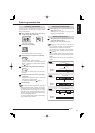
LAN service port settings
Step
1 Select [Setting] next to [LAN service port
settings] on the <LAN setting> screen.
•
The <LAN service port settings> screen is displayed.
Step
2 Set [COM port] and [SSL port] of the Web, and
[COM port] of the special network software.
•
Set the port number for connecting to the PC.
•
Normally, leave the settings as it is.
Notice
• If you are unfamiliar with network settings, you are
recommended not to change the settings.
• For other communication port settings than [COM
port] and [SSL port] of the Web and [COM port] of the
special network software, use the special PC viewing/
communication software. For the usage, refer to the
instruction manual of the software.
E-mail notifi cation - Address setting
Step
1 Select [Confirm] next to [E-mail notification
settings] on the <LAN setting> screen.
•
The <E-mail notifi cation - Address setting> screen is
displayed.
Step
2 Check the settings of [Status], [Address setting],
and [Recorder ID].
•
When you select [Test], test e-mail is sent to the
selected address.
Notice
• To set [Recorder ID] and [Address setting], use
the Web function of this recorder or the special PC
viewing/communication software.
Various settings (continued)
Setup menu